
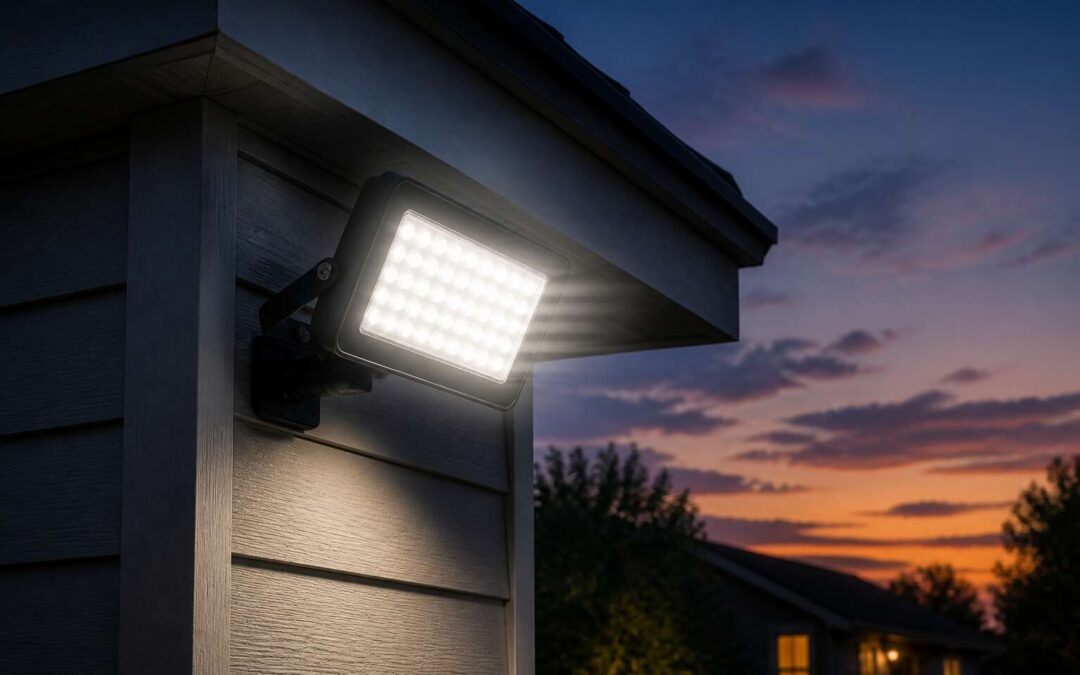
Root Causes of Blinking Floodlights
Electrical Voltage Fluctuations
South African households know the telltale flicker of a grid under pressure. When flood lights blinking becomes a nightly ritual, the cause is rarely the lamp itself. It is the quality of the power reaching it.
Voltage fluctuations occur when supply oscillates above or below the nominal 230 volts. Municipal transformers under strain, and the sudden demand of geysers or air conditioners, produce these dips and surges. The erratic current stresses LED drivers and capacitors, which prefer a steady feed. Older wiring amplifies the problem, as poor connections create resistance and heat.
- Observe whether the blink pattern matches appliance starts.
- Test with a multimeter during peak evening hours.
If your flood lights blinking appears on a single circuit, look for loose neutrals rather than blaming Eskom. Either way, the condition signals a system working beyond its intended tolerance. Some irregularities are transient, but repeated episodes deserve attention.
Faulty Photocell or Motion Sensor
The most overlooked cause of erratic outdoor lighting sits inside a small plastic dome. A faulty photocell or motion sensor decides when your flood lights activate, and when these components begin to degrade, they create switching patterns that resemble power problems. A photocell with failing electronics can chatter between on and off states, producing flood lights blinking that mimics a strobe effect.
For motion sensors, the culprit is often the passive infrared element. Dust, insects, or thermal interference from a nearby wall trigger false detection cycles. This results in flood lights blinking that follows no predictable schedule.
The common failure modes include:
- A photocell that cannot find its daylight threshold due to degraded sensing components
- A motion sensor whose detection zone overlaps with a heat source like a vent or air conditioning unit
- Corrosion inside the sensor housing, creating intermittent contact
These components endure harsh conditions. South African summers bake them on walls and roofs, while winter storms soak the housings. Internal relays wear out after repeated switching.
Loose Wiring Connections
Loose wiring connections are a frequent root cause of erratic outdoor lighting. Behind the wall, a single terminal screw can loosen from thermal expansion and contraction. Each night, the circuit struggles to maintain contact. The result is flood lights blinking that follows no consistent pattern.
Terminal blocks and wire nuts degrade over time. South African humidity accelerates corrosion on exposed copper. A connection that once carried current cleanly now sparks intermittently. The behaviour worsens after rain or on humid evenings.
- Wire connectors that were never tightened properly during installation
- Aluminium wiring paired with copper terminals, which oxidise at different rates
- Cable entry points that allow moisture to creep into the junction box
These failures remain hidden until the fixture is inspected. In my experience, the flood lights blinking is often the only signal a homeowner receives.
Diagnosing the Problem: Step-by-Step
Visual Inspection of Bulb and Fixture
I usually start by examining the bulb itself before touching anything else. A surprising number of flood lights blinking trace back to physical damage that is obvious once you look closely.
- Switch off the circuit and loosen the bulb.
- Check the glass envelope for blackening or hairline fractures.
- Examine the metal contacts for tarnish, rust, or scorch marks.
- Inspect the fixture housing for moisture residue or insect debris.
The socket’s condition speaks plainly, and it deserves your attention! Greenish oxidation on the brass threads means corrosion has already undermined the connection. Even a new bulb will stutter in a worn socket, and persistent flood lights blinking often stem from exactly this kind of subtle degradation. In South Africa’s coastal provinces, salt-laden humidity accelerates the damage, turning a minor issue into a recurring nuisance.
Testing the Power Supply
Voltage testers reveal truths the eye cannot. After the bulb and fixture pass inspection, I turn to the source itself. A multimeter set to AC voltage traces each pulse of current from the breaker to the socket.
For flood lights blinking, I check the supply at three points.
- Measure at the breaker terminal to confirm incoming voltage.
- Test the switch loop for drops under load.
- Probe the socket while the circuit is live.
Load matters! A motor starting elsewhere can drag the line down, and the flood lights blinking will follow like a pulse. In South Africa, municipal grids often sag during evening peaks, and a weak supply amplifies any marginal connection. Steady eyes on the readout show whether the wiring is sound or the grid itself is the source of the stutter.
Checking the Sensor Sensitivity
The sensor’s sensitivity dial often goes overlooked. When ambient conditions shift, a mis-calibrated sensor can trigger repeatedly, causing flood lights blinking that seems random. South African summers bring harsh glare, while winters cast long shadows. These changes fool a sensor set too high or low.
The adjustment process requires patience. Walk the perimeter at dusk and watch the detection zone shift as the light fades. A sensor too sensitive responds to a leaf falling; one too insensitive ignores a person until they are three metres away. Both extremes create the same intermittent cycling. Range, duration, and sensitivity interact, and each must be checked in sequence. I note how the sensor behaves during the transition from daylight to darkness, because that is when misalignment reveals itself.
Using a Multimeter for Continuity
When flood lights blinking persists after other checks, the fault may be a broken conductor that only fails under load. A multimeter in continuity mode exposes the break. Switch off the circuit at the distribution board and confirm zero voltage with a non-contact tester.
Then isolate the fixture from its mounting. Attach the meter leads to the live and neutral terminals. A continuous tone means the circuit is intact. No tone indicates a fracture in the copper, often where wind vibration has fatigued a junction.
- Set the multimeter to the continuity symbol.
- Touch the probes together first to confirm the meter works.
- Test each cable segment individually to locate the break.
The sensor bypasses this loop. Place the probes across its load terminals to verify it closes properly. In Johannesburg, lightning surges often burn out internal components while the housing shows no damage at all.
Bulb-Specific Reasons for Flickering
LED Driver Malfunctions
A flickering flood light often points to a tiny component inside the bulb itself rather than to your wiring. The LED driver, a compact circuit board, converts mains power into stable current. When it malfunctions, the light output wavers unpredictably. Flood lights blinking can be traced to electrolytic capacitors that dry out over time, or to a switching regulator that overheats during prolonged use.
I once inspected a bulb that appeared pristine, yet its driver showed scorch marks. The manufacturing quality of these drivers varies considerably. Budget bulbs typically use smaller capacitors, which degrade far quicker than their robust counterparts. In South Africa’s warm climate, thermal stress inside the fitting accelerates this failure.
- Bulging or leaking capacitors
- Darkened or burnt driver board
- An audible whine from the bulb
These physical clues confirm a driver malfunction. When flood lights blinking persists, replacing the bulb is usually the only remedy, as the driver is sealed within the housing.
Incorrect Bulb Wattage
Here is where wattage enters the equation, often with mischief. Cramming a 100W bulb into a fixture rated for 50W is a direct route to flood lights blinking. The extra heat overwhelms the thermal protection, which then cycles power erratically. I have seen fittings with melted sockets because the occupant was simply too powerful for the space!
Undersized bulbs cause their own trouble. A 20W bulb in a fixture designed for 50W can confuse the driver circuitry that expects a specific load. This misload can also trigger flood lights blinking, though with a slower rhythm.
Common symptoms of wattage mismatches:
- Rapid on-off cycling after warm-up
- Dimming that worsens over time
- A faint burning smell from the housing
Manufacturers list wattage ratings for a reason. Ignore them and your security light flickers unpredictably. The label exists for your benefit. Ignoring it often results in a melted fitting.
Heat-Related Issues
The heat is relentless. When a bulb burns too hot for its own glass envelope, internal stress builds. This thermal pressure can distort the filament or crack the socket connection. That is when flood lights blinking begins as a hesitant flicker, then a persistent stutter. Halogen lamps are notorious for this, their quartz envelopes reaching temperatures that make metal creep.
Watch for these signs of heat exhaustion:
– Discoloured base or blackened glass
– A soft humming that swells with temperature
– Bulbs that dim after ten minutes of operation
The driver and the housing may remain innocent. The bulb itself is the culprit. In coastal towns like Durban, humidity mixes with heat to corrode contacts faster. That corrosion alters resistance, and the flickering deepens. The fitting’s temperature rating becomes the deciding factor.
Sensor and Smart Home Integration Issues
Motion Sensor Trigger Delays
Picture this: your perimeter is a digital sentinel, but its language is a chaotic Morse code of light. When your flood lights blinking becomes a syncopated rhythm tied to your home automation system, the mystery deepens. The choreography of your smart home, where sensors and switches converse in a silent digital language, can sometimes trigger a strobe effect that is pure frustration.
We often assume the hardware is faulty when the true culprit lies in the silent partnership between the sensor and the smart hub. A delay in the motion sensor trigger is a common sorcerer behind the curtain. If your fixture is controlled by a smart relay, the dwell time and re-trigger intervals can conflict with the sensor’s own cooling-off period, causing a rapid on-and-off cycle. This digital handshake often experiences a lag, leading to a reboot loop that manifests as blinking.
To diagnose this spectral behavior, consider the integration pathway:
– The connection between the physical sensor and the Wi-Fi bridge.
– The latency in the cloud server processing the command.
– The firmware version of your smart switch versus the sensor module.
– Interference from other wireless devices on the 2.4 GHz band.
Often, the issue lies in the conflict between the smart home’s “state” and the sensor’s physical reality. The system might think the light should be off, while the sensor insists it should be on. This tug-of-war, visible as flood lights blinking, is a digital echo of miscommunication. It creates a shimmering glitch in your security posture, a telltale sign that your technological guardians need a re-calibration of their digital senses.
Interference from Other Devices
A microwave oven can blind your motion sensor. The radio spectrum in a South African home is crowded with Wi-Fi routers, Zigbee hubs, Bluetooth speakers, and cordless phones. One microwave can generate broadband noise to interrupt a sensor’s signal for seconds.
When that interruption hits, the motion sensor loses contact with the smart hub. I have seen fixtures receive conflicting commands in this state, and the result is flood lights blinking at odd intervals. Common culprits include:
- Cordless phones on 2.4 GHz
- Baby monitors transmitting continuously
- Neighbouring Wi-Fi networks on overlapping channels
- Bluetooth speakers streaming audio
Each device occupies part of the spectrum, forcing the sensor to retry its handshake. In dense Johannesburg suburbs, the interference worsens. The sensor never establishes a stable link, so the smart hub keeps re-sending the off command. This re-send cycle produces the flood lights blinking that many mistake for a faulty bulb.
Settings for Dusk-to-Dawn Mode
Smart home integration issues are the quiet culprits behind flood lights blinking. A dusk to dawn mode relies on precise coordination between the fixture’s photocell and the hub’s geolocation settings. When those disagree, the light receives contradictory commands throughout the evening.
I once traced a stubborn case in a Durban suburb to a hub still configured for Cape Town’s coordinates. The off command arrived 20 minutes before true sunset, then the sensor fought back. That nightly conflict produced flood lights blinking that confused everyone involved.
Settings worth checking:
- The latitude and longitude in your hub profile
- Dusk and dawn offset values
- Duplicate automation rules in multiple apps
A sensor caught between a scheduled off command and a real world daylight reading will cycle endlessly. The hub resends instructions, the sensor rejects them, and the fixture pulses in response. This is a logic problem, not a hardware failure.
Compatibility with Smart Switches
Pairing a flood light sensor with a smart switch often produces unexpected behaviour. A smart switch that interrupts the neutral line can starve the sensor of the standby current it requires. The sensor interprets this as a power loss and cycles its relay, producing flood lights blinking that no amount of app tinkering will resolve.
South African installations frequently pair a European spec switch with an American sensor, and the protocols simply do not converse. The switch sends a PWM signal, the sensor reads it as daylight, and the fixture responds with a staccato pulse.
The compatibility landscape involves several variables:
- The switch’s neutral wire requirement
- The sensor’s protocol versus the switch’s communication standard
- Whether the switch uses a triac or relay for load control
A relay switch with a soft start feature often stabilises the sensor’s behaviour. The switch’s internal capacitor may also interfere with the sensor’s photocell readings.
Firmware Updates for Smart Floodlights
Firmware updates can turn a reliable smart floodlight into a strobe light. The sensor and the hub often disagree after an update, and the fixture pays the price. South African homeowners frequently encounter this after load shedding recovery, when the device reconnects with outdated settings.
The update process can introduce a mismatch. The sensor expects a specific pulse width, the new firmware delivers another, and the result is flood lights blinking at irregular intervals. A factory reset sometimes resolves the issue, but only if the hub also refreshes its device profile.
Consider the integration chain:
- The sensor’s onboard processor
- The hub’s interpretation layer
- The mobile app’s display state
If any one of these holds an old version, the entire system stutters.
Preventative Maintenance and Fixes
Tightening Connections and Terminals
Proper maintenance turns sporadic repairs into routine peace of mind. South Africa’s coastal humidity and inland dust create a corrosive cocktail inside fixture housings, and terminals pay the price. Over six months, even a well-sealed unit can develop micro-movement from thermal cycling, which loosens screw connections and degrades the conductor contact. Tightening terminals to the manufacturer’s torque specification eliminates most intermittent power interruptions behind flood lights blinking.
Before reaching for replacement parts, verify the mechanical foundation of the fixture. Corroded terminals create resistance, and resistance creates heat, which accelerates the degradation loop. A proactive schedule works best:
- Inspect terminal blocks every quarter for discolouration or heat marks.
- Re-torque screws with an insulated screwdriver, never bare metal tools.
- Apply dielectric grease to exposed lugs after cleaning with contact cleaner.
This routine takes fifteen minutes per fixture and costs almost nothing. Yet it prevents the silent corrosion that eventually surfaces as flood lights blinking, a symptom most homeowners accept as normal when it is entirely avoidable.
Replacing the Photocell Sensor
There is a certain tragedy in watching a floodlight perform its dusk ritual with the enthusiasm of a strobe light at a questionable nightclub. When the blinking persists after terminals are torqued and drivers are tested, the culprit is often the photocell sensor. This small cylindrical eye has a thankless job. It must judge the precise moment of twilight, every single day, while baked by African sun and blasted by Highveld thunderstorms.
The sensor’s internal relay is a mechanical component that fatigues over time. A failing unit will often flicker erratically before dying completely. The telltale sign is a light that blinks in overcast conditions or when a car’s headlights sweep across the driveway, yet remains steady at midnight. Replacing the sensor is a five minute task. You merely twist out the old unit, match the wire colours, and reinsert the new eye.
– Turn off the breaker before touching any housing components.
– Confirm the sensor is rated for the fixture’s wattage.
– Position the new eye away from reflective surfaces.
South African summers with their intense UV radiation are particularly harsh on these plastic components. The lens yellows, the internal switch sticks, and suddenly your security lighting becomes a sporadic signal. For under R150, you restore the decisive switch that separates reliable illumination from the maddening flood lights blinking that plagues so many suburban homes. It is the simplest fix on the board, requiring no special tools or electrical theory.
Upgrading to a Constant Current Driver
There is a moment of quiet resignation when you accept that your security light has become a weather station rather than a deterrent. The constant current driver is the component that regulates power to the LED array, and it operates under tremendous thermal stress. Standard drivers in budget fixtures often use inferior capacitors that degrade within two years. When they fail, they do not stop abruptly. They pulse, delivering uneven current that manifests as flood lights blinking in a rhythm that defies electrical logic.
Upgrading to a constant current driver changes the relationship between your fixture and the grid. A quality driver maintains a stable output regardless of input fluctuations, absorbing the surges that plague South African electrical infrastructure. The installation requires matching the driver’s output range to your LED’s specifications, but the effort returns a stability that eliminates the dreaded flood lights blinking before it starts.
– Select a driver with at least 30% headroom above the fixture’s wattage.
– Verify the IP rating suits outdoor exposure.
– Ensure the driver’s case is metal for superior heat dissipation.
The psychological weight of unreliable lighting is heavier than the cost of a proper driver. You stop second-guessing every shadow, every movement at the perimeter. The fixture becomes silent, steady, and watchful. That consistency is worth more than the R400 you might spend, because the alternative is another season of staring at the wall, wondering if this time the light will hold.
Installing a Surge Protector
South African thunderstorms do not negotiate. One distant substation strike sends a spike through the grid to your wall socket, enough to scar the electronics inside your LED fixture. You notice it later as flood lights blinking long after the storm passes!
A surge protector installed on the distribution board handles this. A Type 2 protector rated for lightning-induced surges is the appropriate choice. Fitted on the circuit feeding your outdoor lights, the unit clamps excess voltage to ground before it reaches the driver and LED array. An electrician can complete the installation if the DB board makes you uneasy.
A basic protector costs less than R500, cheaper than replacing a driver twice. It does not stop every surge, but absorbs the destructive ones. In high lightning zones, a second protector at the fixture helps. That keeps the light steady and removes one more cause of flood lights blinking.
Cleaning the Fixture and Lens
A grimy lens is the most undervalued culprit behind flood lights blinking. Dust, pollen, and the fine red dust of the Highveld settle on the glass and bake under the African sun. That layer becomes insulation. Heat has nowhere to escape, so the driver runs hot and shuts down to protect itself. The result is a light that stutters through the night.
Water is another enemy. A cracked seal or a loose gasket lets moisture inside. When the fixture cools, the vapour condenses on the LED board and causes micro-shorts. Those show up as intermittent flickering long before the light dies completely.
Prevent this with a simple routine. Twice a year is enough.
- Switch off the circuit at the distribution board. Wait ten minutes for the capacitors to drain.
- Wipe the lens with a microfibre cloth and a mild soap solution. No solvents, they cloud polycarbonate.
- Check the rubber seals around the housing. Press gently to confirm they sit flush.
- Clear any cobwebs or leaves blocking the ventilation slots on the rear casing.
A steady temperature keeps the driver happy. That is the quiet fix for flood lights blinking when the electrical work is already sound. Also inspect the mounting bracket for rust, as corrosion can loosen the housing and let water past the gasket. Five minutes with a cloth and a screwdriver beats another painful climb up the ladder.
When to Call a Professional Electrician
Preventative maintenance goes beyond the lens. After cleaning, check the housing for cracks, ensure the mounting bracket is secure, and confirm that no tree branches or bird nests are blocking airflow. These small acts prevent the overheating that often leads to flood lights blinking.
When should you stop troubleshooting and call a professional electrician?
- If the light continues to blink after replacing the driver and cleaning all contacts.
- If you notice burn marks or a burnt smell from the fixture.
- If the circuit breaker trips repeatedly when the light turns on.
These signs point to internal faults or wiring issues beyond a DIY fix. A certified electrician can test the circuit under load and inspect the earth leakage. That is the safest route when the problem persists.
Safety Considerations and Quick Solutions
Avoiding Overheating Risks
In South Africa, fire departments respond to hundreds of residential blazes each year where faulty lighting is the suspected culprit. That statistic should give any homeowner pause when flood lights blinking begin to appear. A flickering fixture is often an early sign of thermal stress.
Safety begins with observation. A warm housing is my first clue. If it feels hot to the touch, turn the fixture off and let it cool completely before handling! Check that the mounting surface has adequate airflow; many installations fail because insulation traps heat against the driver.
Consider these immediate steps:
- Inspect for dry leaves, webs, or nesting material near the fixture.
- Confirm the fixture is not recessed into an unventilated cavity.
- Use a non-contact thermometer to measure housing temperature.
A persistent warm housing combined with flood lights blinking demands respect. Overheating can degrade insulation, warp plastic lenses, and expose live conductors. Replacement costs far less than roof repair.
Temporary Fixes While Waiting for Repair
Every blinking light deserves attention. In South Africa, where load shedding stresses every circuit, a flickering floodlight often masks something more dangerous. Safety begins with restraint. Do not inspect a warm fixture with bare hands. Turn off the breaker first before any handling.
A temporary fix while waiting for repair: isolate the circuit and label it. Use a battery lantern for immediate light. Note the exact pattern of flood lights blinking and photograph it for the electrician. This shortens diagnostics.
- Switch off the dedicated breaker.
- Cover the switch to prevent accidental reactivation.
- Record the blink frequency in bright and dim conditions.
These measures are not repairs. They are controlled pauses. Residential fires from electrical faults are common, so treat flood lights blinking as a warning signal. A temporary fix is only a stopgap.
Using a Timer or Manual Override
In South Africa, load shedding stresses every circuit. Flood lights blinking in the yard often mask a loose connection or failing driver. Turn off the breaker before any inspection. A warm fixture can burn or shock. Use a battery lantern for light and cover the switch to prevent accidental reactivation.
While waiting for repair, a timer or manual override gives the household control. It removes the sensor from the circuit. The light runs on a fixed schedule, so the flicker stops. This does not fix the fault, but it restores a reliable light source.
- Switch off the dedicated breaker.
- Let the fixture cool completely.
- Engage the manual override or set the timer.
These steps are a stopgap. Flood lights blinking still need a professional diagnosis, but the home can function without the distraction.
Understanding Warranty and Replacement Options
Eskom recorded over 335 days of load shedding in 2023, a grim record that explains why flood lights blinking has become a persistent annoyance in South African suburbs. Safety begins before you touch anything. Wet grass, rusted brackets, and ageing cables can turn a routine bulb check into a shock hazard. I always tell homeowners to examine the fixture from ground level first, looking for water stains or blackened sockets before climbing a ladder.
Quick fixes often mean reseating the bulb or wiping the contact points, but never with bare hands. Use insulated gloves and a fibreglass ladder on dry ground.
Warranty claims depend on evidence. Manufacturers void coverage for cracked lenses or corroded terminals. If your flood lights blinking stems from an LED driver failure, the warranty may still apply. Photograph the damage and keep the receipt. Replacement choices include a full new fixture or a compatible driver, but that decision belongs to a licensed electrician.