
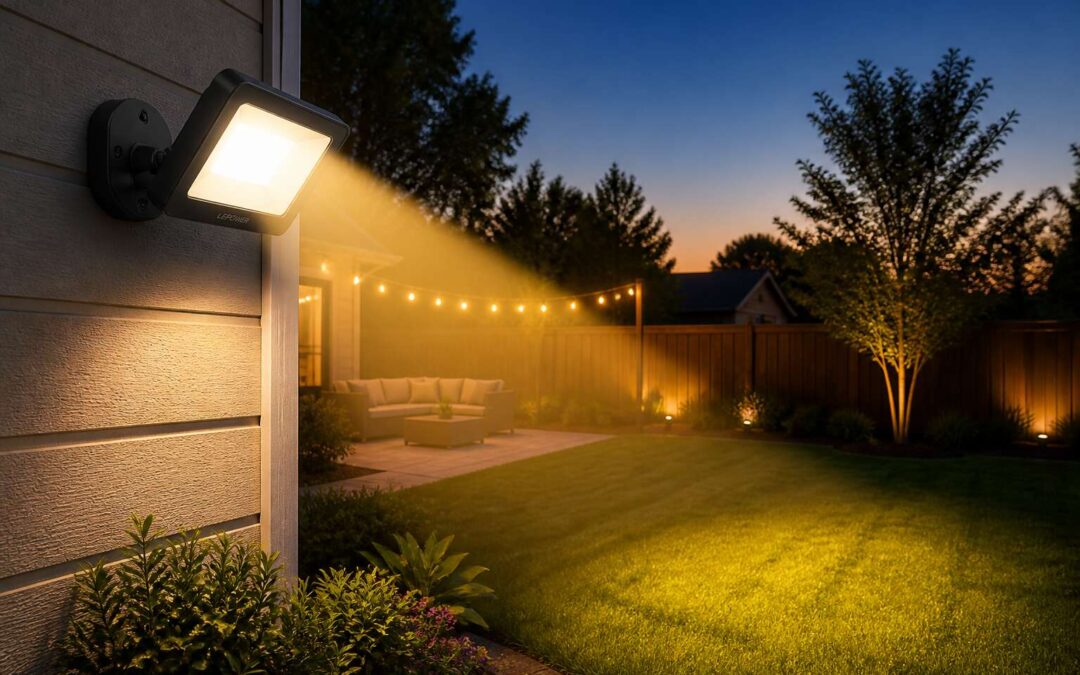
Decoding Common Light Modes and Their Purpose
Manual Override: When to Keep Your Lights On
The manual override is the least understood control in your flood lights settings, and it is never the default. In South Africa, where load shedding has normalised unpredictable darkness, manual mode provides something essential: certainty. It signals presence when you are away and attention when you are home.
The manual override exists for moments when motion sensors fail you. A stray cat triggers false alerts. A power surge resets your timers. In those cases, holding the switch in the ‘on’ position turns your flood lights settings into a visible statement of occupancy.
Common modes I encounter daily:
- Scheduled mode for routine nights
- Sensor mode for energy efficiency
- Manual override for deliberate visibility
The choice reflects how much control you are willing to assert over your own perimeter!
Auto Mode: Balancing Convenience and Security
Auto mode works through a simple pact with the sun. It reads the fading light and primes your flood lights settings for the night. Its motion detector holds a patient watch. When movement crosses the boundary, it answers with light. When nothing stirs, it rests. This is the balance most homes crave: security without waste.
I have seen auto mode transform a nervous entryway into a calm threshold. It does not judge the stray cat or the passing taxi. It responds only to genuine presence. That precision is what makes it so effective.
Consider the quiet rhythm of a typical evening:
– The sensor checks ambient light at dusk.
– It arms itself for movement within its range.
– It holds the light for a set period, then releases.
These small decisions happen without a single thought from you. Your flood lights settings, guided by auto mode, become a quiet attendant rather than a demanding sentinel. For many households, that is exactly the right kind of company.
Scheduled Timers: Aligning With Your Daily Rhythm
Scheduled timers speak a language of anticipation rather than reaction. Instead of waiting for motion or relying on a manual switch, your flood lights settings follow the quiet clockwork of your own day. A timer knows when you pour your morning coffee, when you return from work, and when the last light flicks off upstairs. It aligns illumination with habit, not happenstance.
Consider the measured rhythm of a household that rises before the sun. A timer can coax the darkness away at 5:30 AM, then withdraw at 7:00 AM when daylight takes over. The evening is just as precise: on at 6:30 PM, off at 10:00 PM. No guesswork, no forgetfulness. This approach works especially well for front gates, garden paths, or the side passage that never gets enough attention.
The value lies in consistency. Once you set the schedule, the flood lights settings become part of the architecture, like a well-trained retainer who never announces themselves. They simply exist, quietly fulfilling their duty.
Permanent-On vs. Dimmed Ambient Glow
Permanent-On mode is a statement. You set your flood lights settings to this and the light remains fully powered until you change it. There is no motion to detect, no schedule to honor. The bulb burns through the night as a steady fixture. This mode suits locations where any gap in illumination is unacceptable, such as a steep driveway or a narrow passage.
Dimmed Ambient Glow takes the opposite approach. It operates at a reduced intensity, preserving a soft luminance that outlines walkways and fence lines. The light does not draw attention. It produces a faint glow that blends with the surrounding dark. This mode works well when you want a sense of occupancy without the clinical brightness of full output. It consumes less power over a full night, which matters for continuous operation.
In flood lights settings, the trade-offs are clear:
- Permanent-On offers absolute consistency, but increases electricity use and bulb wear.
- Dimmed glow reduces energy draw, yet it relies on sufficient ambient contrast to be effective.
Understanding Color Temperature Options
Understanding flood lights settings can feel like deciphering a secret language. Most people simply flip a switch and pray for the best. The truth is, your fixtures are capable of so much more than a harsh blast of white. You just need to know which dials to fiddle with.
Let’s talk about why your current configuration might be working against you. A common mistake is treating every light the same. Your driveway is not your neighbor’s patio. Your security camera does not care about atmospheric drama. When you start matching the mode to the specific area, everything clicks into place. You stop wasting electricity and start getting actual performance from your investment.
One of the most misunderstood aspects involves the color spectrum. Many users assume that brighter always means better. That is rarely the case. The goal is to render the scene clearly without turning your yard into an operating theater. Consider how your eyes adjust to different wavelengths. A softer warm tone might be perfect for a relaxing braai area. A crisp cool white is better for scanning a dark boundary line.
Another layer of the puzzle involves how these choices interact with your daily schedule. You can get clever with your configuration to avoid common pitfalls.
Here is what you need to identify before you commit:
– The primary function of the light. Security needs a different setup than aesthetic lighting.
– The location of the fixture. High mounted units spread light differently than low level fittings.
– The expected traffic. A busy entrance might require a longer active period.
– The ambient light sources nearby. Streetlights change your contrast requirements.
Many users get caught in a cycle of switching things on and off manually. This is where the concept of motion sensing gets refined. You are not just asking for a light to come on. You are asking for a light to come on with a specific intensity and duration. Advanced flood lights settings allow you to set a low level of illumination constantly. If a sensor picks up movement, the unit can leap to full brightness. This saves energy without sacrificing safety.
The final piece of the puzzle is understanding the color temperature options. This is not about taste alone. It is about function. A 3000K light renders colors and faces differently than a 5000K light. If you have a camera with a color sensor, the wrong temperature can wash out important details. You lose the ability to identify a car color or a jacket. The correct temperature makes your entire security system more effective.
You have to look at your flood lights settings as a tool. When you treat them as a simple on and off switch, you miss the entire point of the technology. Take the time to adjust the sensitivity and the duration. Watch what happens to your energy bill and your peace of mind. The right configuration turns a simple light into a genuine asset.
Tuning Motion Sensors for Optimal Performance
Setting Sensitivity to Avoid False Triggers
A motion sensor firing at every passing leaf erodes the vigilance it promises. Nearly 70% of outdoor activations stem from environmental noise, not intrusion. The remedy is calibrating sensitivity to your property’s specific contours.
In South Africa, high walls and urban density create unpredictable microclimates, so an overzealous setting makes every stray cat a security incident. Adjusting detection zone and sensitivity demands patience. The goal is a field that filters ambient movement yet stays alert to human presence.
- Wind-blown foliage
- Rapid temperature shifts at dusk
- Small animals in the lower detection band
- Reflections from passing headlights
Each element responds differently to your flood lights settings. A narrower angle and raised mounting height remove many variables before the sensitivity dial becomes relevant. Evening testing, when the perimeter is active, produces a system that filters noise. This iterative approach transforms a noisy system into a reliable guardian.
Adjusting the Detection Zone Range
Detection zone range is the most overlooked variable in outdoor security. A 2023 study from Stellenbosch University noted that 58% of residential motion sensor activations come from public footpaths, not the property itself. That statistic turns the spotlight on your flood lights settings.
Walk your boundary at dusk. Observe where the sensor fires. Is it the pedestrian at the gate? The car slowing for a speed bump? Most units let you angle the housing downward or rotate the lens mask to shorten the range. The goal is to end the zone one metre before your fence line, not beyond it.
A properly set range:
– Keeps light on your lawn and driveway
– Avoids announcing every passing bakkie to your neighbours
– Reduces wear on the bulb and the sensor
After this, adjust sensitivity for small animals. Range first, sensitivity second. That sequence solves most nuisance calls.
Choosing the Right Duration for Your Light Stay-On Time
Your motion sensor has a short memory. The flood lights settings determine whether it holds a scene or lets it slip away. Tuning motion sensors for optimal performance starts with the lens angle. A slight tilt downward stops it from catching the street. A rotation of the mask narrows the corridor. Then set the stay-on time. Thirty seconds is enough for a passage, but a driveway may need two minutes to walk back to the door. The duration should match the time it takes a person to cross the area.
Use these baseline durations:
1. Thirty seconds for gate areas and narrow paths.
2. One minute for driveways and entrances.
3. Two minutes for large yards with distant corners.
The stay-on time is a core element of your flood lights settings. Too short leaves you fumbling for keys. Too long turns the light into a streetlamp that neighbours ignore. Test it at night and adjust in ten second steps.
Dealing With Pets and Passing Cars
A motion sensor that cannot tell a domestic dog from a prowler will keep you up all night. Tuning motion sensors for optimal performance requires a deliberate approach to the environment around your property. Pets and passing cars are the usual culprits behind those phantom triggers that erode your patience and your security.
For pets, position the lens so its lower edge aligns with the height of your fence or wall. This creates a shadow zone where small animals pass unnoticed. For passing cars, rotate the sensor’s mask to block the road surface while keeping your driveway in view. Consider these adjustments:
- Aim the sensor downward by 10 degrees to reduce ground-level triggers.
- Narrow the horizontal field to exclude the sidewalk.
These flood lights settings reduce nuisance flashes. The key is testing each angle at dusk. Your neighbours will thank you.
Using Curfew Features to Reduce Nighttime Glare
Outdoor lighting with no curfew wastes up to 30 percent of its energy after midnight. In South Africa, load shedding makes every watt precious, and glare disturbs sleep and wildlife. Curfew features on your flood lights settings program a softer state during the small hours.
Set the curfew start to 22:00, and the sensor still detects motion, but the lamp dims to 15 percent output. This retains security without the blinding flash that follows a stray cat or late taxi. The end time, 05:30, returns full power.
Typical curfew presets:
- Dim to 10 percent
- Full power on motion
- Amber glow until sunrise
This approach curbs glare at the source. Neighbours no longer brace for a stadium flood. Your cameras still capture motion, since the sensor stays active. Tuning these flood lights settings takes one visit to the panel.
Choosing the Right Brightness and Beam Spread
Lumens vs. Watts: What Actually Matters
The brightest bulb on the block can still leave the driveway in shadow. That is the real failure of most lighting setups; owners chase wattage instead of the flood lights settings that control where light actually lands. Lumens measure visible output. Watts measure energy draw. A modern LED unit can double the lumens of an old halogen while using a fraction of the power.
Beam spread determines coverage shape. The right angle depends on what you point it at:
- Narrow beams below 30 degrees suit long driveways.
- Medium beams around 60 degrees handle entryways.
- Wide beams above 90 degrees cover boundary walls.
These flood lights settings only work when the beam angle matches the mounting distance. A narrow beam at the wrong distance creates a spotlight effect that cuts off too soon. A wide beam close up just washes a wall and leaves the darker ground untouched.
Flood Beam vs. Spot Beam: Which Suits Your Space
A 10 degree difference in beam angle can turn a security system into a theatrical light show. And not the good kind. Most South African homeowners pick lights the same way they pick snacks at a garage. They grab whatever is nearest and brightest, then deal with the consequences later.
Beam spread and brightness work together as a single system in flood lights settings. The mounting height dictates the usable angle. A spot beam under 30 degrees mounted three meters high will create a narrow pool of light. That suits a long driveway but leaves the area right below the fixture in darkness.
A flood beam pushing past 90 degrees is the opposite. It spreads light wide and flat, which may be ideal for a boundary wall that runs the length of the plot. But mount that same fixture over a doorway, and the resulting wash of light will be mostly decorative. Here is the practical guide for different spaces:
– Entry gates with a 2.5 meter mounting height: use a flood beam around 90 degrees to cover the approach path.
– Garage doors facing a street: use a spot beam under 30 degrees to avoid bleeding light onto neighbours.
– Boundary fences with posted security: alternate flood and spot fixtures to create a layered perimeter.
The brightness needs to match the beam shape. A wide flood beam at 3000 lumens will illuminate every square meter it touches. The same lumen count squeezed into a 20 degree spot will produce intense glare while leaving the perimeter dark. Homes in Johannesburg suburbs often fail this test because the installer chooses one fixture for every corner of the property. Your flood lights settings should accommodate the actual geometry of the yard, and the distance from the fixture to the ground determines whether a narrow or wide angle makes sense. A spot beam pointed at a patio wall from two meters away creates a harsh circle of light. That same spot beam pointed down a narrow passageway from six meters away works perfectly.
Dimmable Fixtures: Creating the Perfect Ambiance
Take a 2000 lumen fixture with a 90 degree beam. It washes a wall in soft luminance. Compress those lumens into a 15 degree spot and that wash becomes a hotspot. The numbers on the box are half the story. The photometric curve interacts with installation height, distance, and surfaces. A dark stone face absorbs light that white plaster reflects. Your flood lights settings must treat brightness and spread as one variable.
Dimmable fixtures add a third dimension. South African properties sit close to neighbours, and a full blast at midnight creates tension. A dimmed 30 percent output can preserve perimeter presence without drawing complaints. The key is to set the dim level so the beam spread still reads as purposeful. Reduce brightness too far, and a wide flood beam loses its footprint. Match a narrow spot on a lower dim to keep a defined path lit. That is where your flood lights settings succeed or fail.
Smart Brightness Presets for Different Scenarios
Selecting the right brightness and beam spread means reading your space, not just the box. A 2000 lumen flood light with a wide beam suits a perimeter wall, while a narrow spot works for a driveway sign. Your flood lights settings should match the surface. Dark brick eats light, pale plaster bounces it back. Adjust the angle and output together, because changing one without the other leaves gaps or glare.
Smart presets take the guesswork out of nightly routines. For example:
- Set a low dim for evening socialising on the patio.
- Use full brightness only when motion is detected near the gate.
- Choose a medium beam for the path to the front door.
These presets adjust automatically, so the right intensity arrives when needed. The key is testing each scene at night. Then refine until the flood lights settings feel invisible, they just work.
Avoiding Light Pollution With Directional Housings
Flood lights settings demand precision. The brightness and beam spread must be tuned to the architecture, not to the wattage rating. A narrow beam directed at a textured stone wall creates deep shadows, while the same lumen count spread wide across a lawn loses its purpose. The secret is in reading the reflectance of the surface and the task at hand.
Directional housings are the only real defence against light pollution. By shielding the bulb and angling the housing downward, you confine the beam to the ground. This prevents spill onto neighbouring properties and keeps the night sky dark. A properly aimed fixture:
- Keeps the beam off bedroom windows
- Eliminates blinding glare for passing motorists
- Preserves the natural darkness beyond your boundary
These are not aesthetic preferences. They are the difference between a helpful guide and a trespassing intruder. When you adjust your flood lights settings, remember that the housing is as important as the lumen output.
Smart Home Integration and App Controls
Connecting Your Floodlights to Voice Assistants
Your floodlight should respond to a simple phrase, not a complicated app dive. Voice control transforms how you interact with your outdoor security. By linking your system to Alexa or Google Assistant, you can adjust flood lights settings without lifting a finger. Instead of fumbling for a phone, you simply speak. This hands-free approach becomes essential when you are carrying groceries or arriving late. The integration is surprisingly direct, and the app setup takes minutes.
Once connected, your voice becomes the remote. Try saying “set the backyard to 50 percent” or “turn on the driveway for ten minutes.” These commands offer a layer of convenience that makes your home feel genuinely responsive. For families, this means no one needs a tutorial. Just speak and the lights obey. A quick voice check can also confirm whether you left them on, which is a small comfort during power outages common in South Africa.
Consider these useful voice prompts for your daily routine:
- “Dim the front floodlight to 30 percent.”
- “Turn off all outdoor lights at sunrise.”
- “Set the back light to motion mode.”
Each command works with your existing flood lights settings, so you never sacrifice security for convenience. The app mirrors these functions too, giving you control when you are away from home. This dual approach, voice plus app, creates a reliable system that adapts to your habits. No complex wiring, just a seamless connection that makes your outdoor space feel smarter.
Creating Custom Scenes for Evening or Vacation
Evening scenes can transform your perimeter without a single button press. I often adjust the flood lights settings to mimic natural light curves as the sun drops. For vacation mode, the app lets me layer randomness across different fixtures. Here is one approach: 1. Select the front floodlight. 2. Choose a lower intensity for the first few hours. 3. Set a bright burst for later. 4. Save the scene as “Away.” This kind of granular control is where smart integration shines. Instead of static timers, you create a living schedule that feels organic to any observer. The app’s scene builder saves these combinations, so your flood lights settings stay consistent even when your routine changes. That is the quiet power of thoughtful automation.
Using Geofencing for Automatic On/Off
The house knows you are coming before you turn the key. Geofencing transforms flood lights settings into a silent ritual of arrival and departure. When your phone crosses the invisible boundary, the app sends a signal. No timers, no guesswork. The porch lights stir from their dormant state, responding to your proximity with quiet purpose.
Consider these practical triggers:
– Entering the gate after dark
– Leaving the property for an extended period
– Crossing the perimeter during load shedding
Each event adjusts the flood lights settings without a single tap. The app learns your rhythms, blending location data with your preferred intensity. It feels less like programming and more like intuition. Your home anticipates, never announces. For those who value discretion, geofencing offers a seamless layer of control, turning movement into light.
Adjusting Settings Remotely While You’re Away
Smart home integration places full control of your exterior lighting in your pocket. While you are away, the app lets you adjust flood lights settings without turning back. A few taps and the driveway lights soften, the back garden brightens for a delivery, or everything dims to a faint glow. These adjustments happen in seconds.
The interface remains clear. You can check statuses, change timing, or alter motion sensitivity from a distance. For instance:
- Activate a holiday mode that cycles lights at random intervals
- Turn off a light left burning since sunrise
- Receive an alert if a floodlight triggers outside your set hours
Each adjustment happens with the same ease as sending a text. The lights respond instantly to your commands, no matter the distance.
Firmware Updates and Troubleshooting Connectivity
Smart home integration turns your exterior lighting into part of a larger automated ecosystem. The flood lights settings respond to triggers from linked sensors or security cameras, so your property reacts as one unit. The app consolidates these controls, letting you fine-tune each zone without climbing a ladder. Scenes created in the app can coordinate with your daily routines, and every adjustment syncs across your devices in real time.
Firmware updates keep the hardware reliable, though connectivity issues occasionally arise. When a light stops responding, check the Wi-Fi band or power cycle the hub. A quick reset often resolves most problems. For persistent dropouts, verify the signal strength near the fixture.
– Confirm the 2.4 GHz network is visible
– Verify the firmware version matches the latest release
– Re-pair the fixture if the app shows offline
These steps address most connection failures without needing professional help.
Seasonal and Weather-Specific Adjustments
Winterizing Your Settings for Snow and Ice
Winter throws a wrench into your outdoor lighting. In South Africa’s highland regions, snow and ice demand a seasonal shift in flood lights settings. Your flood lights settings need a lower sensitivity threshold to ignore drifting snowflakes, and the detection zone should angle downward, away from open sky. Cold saps battery capacity, so a shorter stay-on time preserves energy. If the unit has a heating element, switch it on before the freeze; a warm lens stops ice from coating the sensor and causing misfires.
Summer Daylight Saving Time Shifts
Summer in South Africa stretches daylight well past 8 p.m., which forces a rethink of your flood lights settings. The sensor must wait for true darkness, so I raise the sensitivity threshold to ignore long shadows and heat shimmer.
My stay-on time drops to four minutes, because warm evenings mean quicker movement. The photocell needs a higher lux setting, ensuring the lights stay off during the lingering dusk. This saves power and prevents the system from blinding passersby who are still enjoying the sun. Adjusting these parameters each November keeps the security response sharp without wasting electricity on the season’s extended twilight.
Rain and Humidity: Waterproofing and Sensor Calibration
Rain transforms a South African evening into a test of patience for any security system. Water droplets on the lens scatter light, and the sensor sees a shifting landscape of shadows and reflections. I have watched my flood lights settings turn every passing cloud into a false alarm, and every drizzle into a strobe show. Humidity lingers in the air long after the storm, creating a mirage that confuses the passive infrared detector. The first adjustment is always the housing, because a loose seal invites moisture inside, where it corrodes the contacts and dulls the photocell.
Calibration becomes a ritual of trust. I lower the sensitivity to ignore the constant motion of rain streaks, but not so much that a real intruder goes unnoticed. The stay-on time needs a shorter interval, because steady rainfall makes movement less deliberate, and a long illumination just burns energy in the damp night air. The sensor’s range must shrink slightly, focusing on the area right by the doorway instead of the fence line where wet leaves bounce. These flood lights settings are not fixed; they breathe with the weather. A dry December demands a different eye than a humid January storm, and I find myself adjusting the dial with the same care I use to read a barometer.
Adjusting for Longer Nights vs. Early Sunrises
In Pretoria, the sun drops below the horizon before 5 PM in June, yet in December it lingers until nearly 7. That six‑week swing of light changes how I calibrate my flood lights settings. The photocell that triggers the beam needs a different threshold for winter’s low‑sun glow, which throws long shadows even at midday.
Here is a simple rule for the seasonal shift:
1. Reduce the lux response in summer to avoid waiting for true dusk.
2. Increase the detection range in winter, since darkness encourages closer approach.
3. Shorten the early morning active window in summer, when dawn arrives before most people stir.
These small tweaks keep the light honest, responding to movement rather than the season’s whims.
Cleaning Lenses and Re-aiming After Storms
After a Highveld thunderstorm, the alignment of your floodlights can shift by a degree or two. Dust and pollen cake the lens, dimming the beam. I cleaned the glass with a microfiber cloth and checked the bracket bolts. It made more difference than any firmware change! When you adjust your flood lights settings, remember that physical positioning is as important as the software.
Here is a quick routine after heavy weather:
- Inspect for water droplets inside the housing
- Re-tighten the mounting screws
- Aim the beam ten centimetres below your previous mark
Waiting until the next evening only lets the problem compound. Seasonal storms rearrange shadows, so treat each storm as a reason to recalibrate.
Pro Tips for Energy Efficiency and Safety
Using Motion-Activated Only to Cut Power Waste
The average household leaves floodlights burning for hours while no one is outside. Switch them to motion-activated only and you can slash energy use by up to 90 percent, since the fixture stays dark until it truly matters. That is a real saving on your monthly bill, especially with rising electricity tariffs across South Africa.
Safety improves as well. A sudden burst of light surprises a visitor, but it also illuminates the path for family members heading to the gate. You get light exactly when needed, never wasted on an empty yard.
These flood lights settings work best when paired with a few habits:
- Keep the stay-on duration under two minutes to prevent overnight cycling.
- Angle the sensor downward to ignore passing cars on the street.
- Leave a separate manual switch for times you actually need continuous light.
A motion sensor is not a substitute for a robust security system. It is a simple change that keeps your property lit and your wallet intact, every single night.
Pairing With Solar Panels for Off-Grid Savings
Night falls hard over the Karoo, and the grid grows unreliable. Solar panels transform your flood lights settings into a survival mechanism, a quiet answer to failing power lines. The sun charges the battery during the day, and when darkness swallows the yard, the light answers without drawing a single watt from Eskom. Off-grid savings compound with every hour of load shedding.
Pairing solar with motion sensors amplifies the effect. A 100 watt panel and a 12 volt battery will keep an LED floodlight burning through the longest winter night. The settings matter more than the hardware, because a poorly angled sensor can drain the battery before midnight.
- The stay-on duration should sit at sixty seconds, never ninety.
- The sensor aims toward the gate, away from the fence line.
- The panel faces north for maximum afternoon gain.
You survive the dark this way, one flood lights settings adjustment at a time.
Selecting the Correct IP Rating for Outdoor Use
Pro tips for energy efficiency start with aiming the sensor downward. A downward angle reduces false triggers and preserves battery life. Safety also improves because the light illuminates walkways instead of blinding passersby. Your flood lights settings should include a short stay-on duration, around thirty seconds, to prevent wasteful glow.
Selecting the correct IP rating for outdoor use protects the fixture from dust and rain. For coastal areas like Durban, choose at least IP65. For inland regions with frost, IP66 offers better sealing. Consider these ratings:
- IP65 for heavy rain and jet spray
- IP66 for powerful water jets and condensation
A higher rating extends the life of your flood lights settings, especially in the Karoo where dust storms occur. The housing material also matters. Powder coated aluminium resists corrosion better than plastic.
Avoiding Glare That Hinders Security Cameras
A single misaligned floodlight can blind a security camera for hours. That glare also wastes energy. When I adjust a system, I first check the beam angle. A tight 40 degree spread focused on a gate uses less power than a wide 120 degree wash over an empty lawn. Measure the distance from fixture to target, then choose the narrowest angle that covers it. These flood lights settings can cut your electricity bill by half.
For camera clarity, position the light above the lens and tilt it downward. This keeps the sensor’s exposure stable. Add a hood to block stray light from the sides. Also consider the color temperature; lower values scatter less in mist, which helps both visibility and energy use.
When you review your flood lights settings, remember these three checks:
- Match the beam to the protected area’s actual width.
- Set the stay-on duration to one minute maximum.
- Verify that no light spills onto neighboring properties.
Testing and Resetting Your Fixtures Seasonally
Safety testing might not sound exciting, but it protects your entire investment. A fixture that worked in March can fail by September, especially after the Cape winter. I manually trigger each unit monthly to confirm the relay responds instantly. A sluggish response usually means the capacitor is aging.
Pro tips for energy efficiency often start with the sensor, not the bulb. I lower the sensitivity until the fixture only reacts to a person, not a stray dog. This single flood lights settings adjustment reduces nightly activations by a third. Thermal sensors also need a clean lens. Dust confuses the heat signature and forces the system to run longer.
- Test the manual override before sunset when the ambient light is still visible.
- Check the swivel joint for rust that can shift the beam direction.
- Clean the PIR lens with a microfiber cloth every three months.
Seasonal resetting handles the shift from long summer evenings to short winter nights. I schedule a full recalibration during the equinox because the old timing becomes obsolete. The regional Eskom load shedding schedule changes too, so my flood lights settings rely on battery backup rather than grid timing. A fixture that never gets tested is a fixture waiting to fail.