
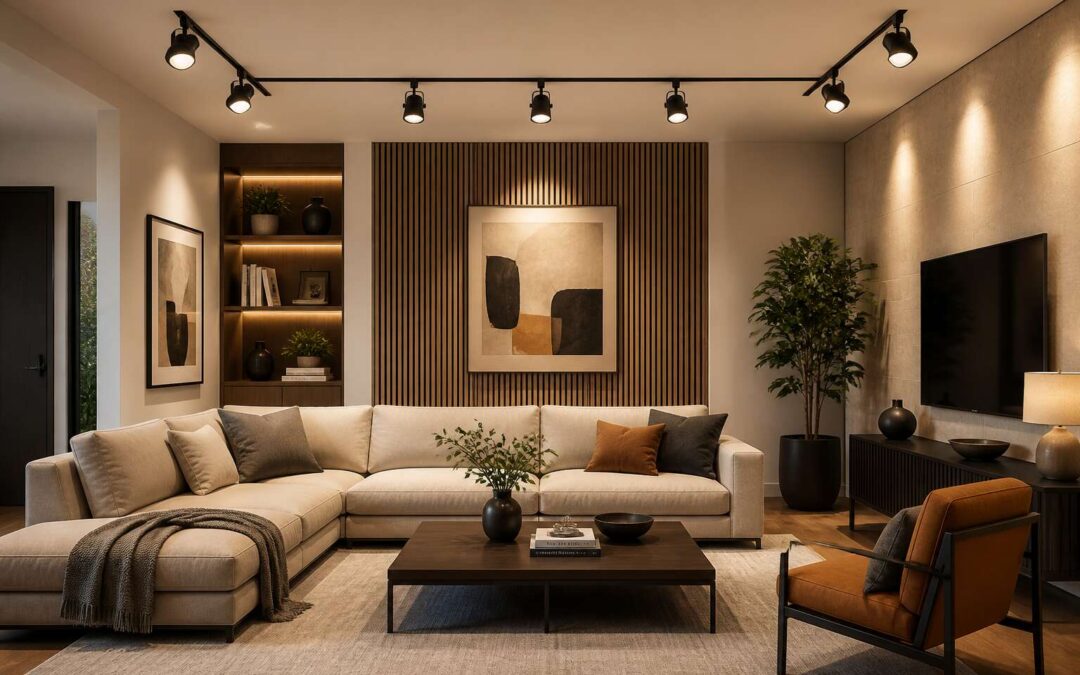
Understanding High-Output Interior Illumination
Defining Lumens, Lux, and Candlepower for Indoor Spaces
A single 500 lumen flood light indoor fitting can transform a cavity from a mere void into a functional zone. Yet the number printed on the box means little without understanding the language of light physics. You are not just buying a bulb; you are purchasing a tool for visibility. Most consumers confuse the total output with the perceived brightness, leading to poorly lit workshops or glaringly bright hallways.
To truly master your space, you must differentiate between the three core metrics.
– Lumens measure the total quantity of visible light emitted by a source. It is the raw volume.
– Lux measures the illuminance, or how much of that light actually lands on a surface one meter away.
– Candlepower (or candela) measures the intensity of the beam in a specific direction, which dictates focus and throw distance.
Consider a high bay fitting with high lumens but low lux; it will wash the ceiling in glow while leaving the floor in shadow. Conversely, a spot with high candlepower will pierce the distance. For a garage or storeroom, you want a balance that mimics the highveld sun, not a laser pointer. The lux rating is your true guide for task work, while lumens tell you the sheer energy spent. When you calculate these figures against your room’s square meterage, you finally gain control over the atmosphere, banishing guesswork from your installation.
Color Temperature: Warm to Cool Light for Different Rooms
Between 2700K and 6500K lies the difference between a sanctuary and an operation theatre. For flood lights indoor, the kelvin scale decides whether the light works for you or against you. Warm light, around 3000K, carries the deep orange of late afternoon, ideal for living rooms and spaces meant for unwinding. Cool light, above 5000K, matches the sharpness of midday, suited for workshops and garages where precision carries the day.
Here is the working rule for most homes:
- Under 3500K for relaxation zones.
- Between 4000K and 5000K for task areas.
- Above 5500K for detailed inspection.
The colour temperature alters how the eye perceives depth and contrast. I have seen a 6000K flood lights indoor unit strip a grimy storage room of every shadow, making it feel immediate and urgent. A 3000K unit softens the same space. The choice comes down to the body’s response, not the wattage on the label.
How Indoor Brightness Differs from Outdoor Flooding
Stand beneath a 60,000 lumen tower light on a construction site and the glare sends the eyes scrambling. Bring that same fixture inside an office, and the result is pain, not brightness. Outdoor flooding assumes infinite space for light to scatter. Interior illumination operates inside an enclosed space where every surface competes for attention.
For flood lights indoor, the critical shift is from beam spread to reflection management. Outdoors, the ground absorbs most of the light. Indoors, a white ceiling returns roughly 85 percent of the light back down, a concrete floor bounces another 25 percent. That trapped energy multiplies perceived brightness. Designers must cut lumen output by half when moving a fixture from open ground to a compact room.
The second difference is direction. Outdoor floodlights aim wide to cover ground. Flood lights indoor must aim carefully to avoid bouncing glare off polished surfaces.
Selecting the Perfect Fixture for Interior Environments
LED vs. Halogen: Efficiency and Light Quality
A halogen bulb usually consumes nearly five times the wattage of an LED for comparable light output. That difference drives heat into your room and your electricity bill. Halogen renders skin tones beautifully, but its short lifespan and wasted energy make it costlier over time. LED modules now offer tunable white light and precise beam control without fragile filaments.
When you select flood lights indoor, wattage is misleading; lumen output and beam angle matter more. Modern LEDs reach full brightness instantly at typical indoor temperatures, eliminating halogen’s only practical edge. The real distinctions appear in driver quality and thermal design. The relevant markers are:
- Halogen: 2,000 hour lifespan, full spectrum.
- LED: 25,000 hour lifespan, 80% less energy.
Motion Sensor and Smart Home Integration Options
Ever walked into a storeroom and felt like you were being interrogated by a 500-watt spotlight? That is the classic mistake. We have moved past raw wattage into a world where your flood lights indoor can be as intelligent as your phone. The fixture itself is the star. You want a unit with a proper IP rating, even indoors, because dust and moisture are sneaky. Also, check for a driver that does not hum like a swarm of disgruntled bees. Thermal management is critical. A well-designed heat sink means the LED chip stays cool, maintaining its light output and lifespan. Do not settle for a sealed unit that will bake itself to death.
Now, let us talk about the party trick. Smart integration. Your flood lights indoor should not just switch on. They should think. Pair them with a motion sensor that can differentiate between a human and a rogue pet. This saves energy and spares you the fright of a sudden blaze of light at 2 AM. Beyond that, smart home integration allows you to schedule lights, dim them for a movie night, or control them from your couch. South Africans, especially, appreciate the ability to switch everything off remotely when you forget whether you left the garage lit.
When you are browsing for these tech-laden units, keep these specs in mind:
– Protocols: Ensure compatibility with your existing home assistant, be it Zigbee, Wi-Fi, or a proprietary hub.
– Sensor range: A narrow 5-meter detection zone is useless. Look for a 10-meter sweep.
– Adjustable heads: A fixed fixture is limiting. You need to aim the beam where you need it.
– CCT switching: The ability to change from warm to cool light on the fly is a game-changer for interior settings.
This is the difference between a simple lamp and a lighting ecosystem. With the looming threat of loadshedding, having a smart system that can integrate with battery backup is a prudent move. It is about creating a space that responds to your presence and your schedule. So, ditch the old-school floodlight that only knows “on” and “off”. Embrace the sensor, embrace the app, and let your indoor lighting do the heavy lifting for you. The future is not just bright; it is obedient.
Dimmable Fixtures and Scene Control
Stumbling over a child’s toy at 2 AM is a rite of passage in South African households. The solution is not more wattage. It is control. Dimmable flood lights indoor let you set a low ambient level for night time navigation, which is kinder to your eyes and your shins. The driver determines everything. A cheap fixture will flicker, buzz, or simply refuse to dim below a blinding fifty percent. Look for a driver with a smooth dimming curve that drops to one percent output.
Check these features before buying:
1. Fade time settings to transition gently instead of snapping on
2. Scene presets, such as a bright cleaning mode and a dim evening mode
3. Compatibility with your dimmer switch, ideally trailing edge or LED rated
Selecting dimmable flood lights indoor without checking the driver is why the hallway resembles a police interrogation room. Read the spec sheet. Your night vision will appreciate it.
Water-Resistant Ratings for Kitchens, Bathrooms, and Basements
South African bathrooms generate steam that lingers long after your shower. A fixture without proper water resistance will corrode, short, or simply die. That is why IP ratings matter.
The IP code tells you exactly what survives. IP44 handles splashes, suitable for bathroom vanities and kitchen sinks. IP65 withstands jets of water, ideal for basements prone to flooding. IP67 means temporary submersion, overkill unless your laundry room floods every rainy season. I have replaced enough corroded fittings to know the difference.
Before buying flood lights indoor, match the rating to the room:
- Kitchen: IP44 for steam and grease splatter
- Bathroom: IP44 minimum, IP65 for wet zones
- Basement: IP65 if moisture collects on floors
A ceiling rose that drips water into an IP20 fitting will eventually fail. Read the spec sheet. The picture on the box tells you nothing about water resistance.
Strategic Placement to Maximize Room Luminance
Living Areas: Layering Ambient and Accent Light
Fifty percent of home lighting complaints are really about flatness. A single ceiling lamp in a lounge makes every piece of furniture look like a stage prop. You need a depth effect, and that is where strategic placement comes in. Recessed flood lights indoor, those eyeball style fixtures, solve this by creating vertical pools of light against walls. They stretch the perceived height of the room and push corners outward.
Consider using them to destroy shadows from your feature wall, a task a standard table lamp cannot achieve.
– Position at least 30 cm from the wall to avoid a harsh hot spot.
– Angle the beam at 30 degrees to graze textured surfaces, like brick or stone fireplaces.
– Aim them against bookshelves to illuminate spines and add complexity.
The old rule of thumb was to wash every inch of the floor with light. That approach only works for crime scene investigations. Modern living benefits from layering ambient fixtures with accent beams. The secret in Johannesburg homes is to use a dimmer switch on your flood lights indoor to sculpt the mood. Turning them down to 20 percent creates a cozy glow, while turning them up mimics a bright overcast afternoon for family gatherings. Do not light up the entire room; instead, focus these beams on architectural details and let your floor lamps handle the rest. This creates a dynamic visual hierarchy that makes the space feel tailored.
Kitchens and Workstations: Task-Oriented Beam Angles
Step beyond the graceful ambiance of the living room and into the humming heart of the home, the kitchen. Here, the light has a different job entirely. The 3000K wash that flatters a sofa can cast a pallor over a chopping board. This is where flood lights indoor become precision tools. A single pendant hanging over the island is a fine start, but it creates a countertop eclipse, leaving your hands and the ingredients in shadow.
I find the most effective solution is to mount flood lights indoor directly beneath the upper cabinets. This placement floods the workspace with an even, shadowless glow, illuminating the task at hand without blinding you. It is a functional magic that transforms a countertop from a dim surface into a bright stage. For deeper workstations, consider a recessed fixture above the desk. The key is to light the task, not the room.
Garages and Utility Rooms: Wide-Coverage Mounting Positions
South Africans lose roughly 2,500 hours of usable light each year to load shedding, yet most garage ceilings stay stubbornly dark. A single globe on a cord is not coverage. It is an invitation to stub your toe!
I have found that garages and utility rooms demand wide coverage mounting positions. Install flood lights indoor at the highest junction points, aimed diagonally across the space. This eliminates the single-shadow problem where your workbench hides behind your own silhouette.
For utility rooms, consider:
- Corner mounting at a 45 degree angle to bounce light across two walls.
- High gable mounts that cast a broad cone over storage racks.
The goal is luminance that reaches the far shelf and the floor drain. Position fixtures so their beams overlap at the edges. Overlap removes dark seams. You do not need a designer. You need geometry, and you need flood lights indoor.
Home Theaters: Controlling Glare and Reflections
The true challenge in a home theater is not brightness, it is direction. A lamp that lights the room evenly can still ruin a picture if its beam catches the screen edge. I have spent hours shifting fixtures to kill that specular highlight!
Strategic placement means aiming flood lights indoor at surfaces that scatter rather than mirror. Tuck them along the side walls, behind acoustic panels. The beam should wash the walls, not the glass. A projector screen turns specular at wide angles; any direct source bounces into the seating area.
The typical reflection traps include:
- Glossy media cabinets opposite the screen.
- Framed glass art catching edge spill.
- Light ceilings bouncing glow onto the lens.
When the ambient layer runs perpendicular to the viewing axis, reflections vanish while the room keeps a soft luminance.
Highlighting Artwork and Architectural Features
In a country like South Africa, where the sun’s intensity shapes our architecture, the shift to evening illumination is a deliberate act. I have found that the true power of flood lights indoor lies not in sheer volume of light, but in the precision of their aim. A room becomes memorable when the luminance falls on textural stone, raw timber, or a dramatic canvas, rather than dissolving into a flat, lifeless wash.
Consider the visual weight of a room. A wall of Karoo stone or a feature of exposed brick absorbs a broad beam and returns a warm, diffuse glow. The cleanest approach is to angle fixtures so they graze the surface, creating a play of highlights and shadows that adds depth. This technique transforms a flat wall into a tactile feature. When you position the beam with care, the entire space feels curated.
To create a layered narrative with your indoor flooding, focus on specific anchor points:
– A gallery wall where the beam spreads evenly to eliminate harsh hotspots on the glass.
– The ceiling coffer, where light pools upward to draw the eye and make the room feel taller.
– The structural pillar or fireplace, which becomes a sculptural element when isolated from the ambient layer.
– Deep-set shelves, where a narrow beam cuts through the shadow to reveal the objects within.
The most common error is treating a flood light like a spotlight. The goal is to paint the room with luminance, not to pinpoint it. When you use flood lights indoor to articulate the architecture, you forgive the dark corners of the room, allowing them to recede naturally. This creates a dynamic environment where the eye moves from the warm glow of a textured wall to the quiet shadow of a passage. The difference is a space that feels balanced and considered, rather than simply lit. The light becomes a material in the decor, interacting with the surfaces we live with daily.
Installation, Safety, and Long-Term Performance
Basic Wiring and Electrical Load Calculations
The first rule of illuminating a room from above is to respect the electricity that feeds it. Most residential circuits handle 15 or 20 amps, and a single 150-watt halogen flood light indoor unit can draw over an amp by itself. When you plan to install multiple fixtures, you must calculate the total wattage against the breaker rating. Exceeding 80 percent of the circuit’s capacity is a direct path to tripped breakers and warm wiring, which in an enclosed space is the first whisper of a fire. I have seen the aftermath of a poorly wired fixture in a Cape Town garage, and it is not a sight for the faint of heart.
The physical mounting is only half the battle. A flood light indoor unit still requires secure terminations and a strain relief that keeps the cable from pulling against the connector. Use a junction box rated for the fixture’s weight, and never leave bare copper exposed. The wiring should be routed away from any sharp edges or moving parts, particularly in a utility room where the light shares space with other equipment.
– Check the local municipal regulations, as some areas in South Africa require a certified electrician for permanent installations.
– Verify the earth leakage (ELU) breaker is functioning before you energise the circuit.
– Use a voltage tester to confirm the power is dead at the switch box, not just off at the wall.
Long-term performance depends on the quality of the connections you make today. A loose neutral wire will arc, and that arc will eat away at the insulation over months, not years. For the lifespan of the lamp itself, consider the heat build-up in an enclosed fitting. The driver and the LED chips will degrade faster if the housing is not ventilated. When you run the wires, leave a small service loop. It costs nothing now, but it gives you room to splice in a new driver later without pulling the entire unit apart. The darkness waits for no one, but a well-prepared circuit will keep it at bay for a very long time. The same principles apply whether you are lighting a passage or a workshop, and every flood light indoor installation benefits from this care.
Optimal Mounting Heights for Uniform Spread
Mounting a flood light indoor is a geometry problem, not a guessing game. The beam angle and ceiling height must work together to wash the floor evenly, or you end up with bright islands surrounded by gloom. For standard 2.4 metre ceilings, set the fixture centre at least 30 centimetres below the ceiling line and tilt the head downward at 30 degrees. That simple move kills harsh wall scalloping before it starts.
Higher ceilings demand a different approach. Every extra metre of height means raising the fixture by roughly 20 centimetres and widening the beam to cover one and a half times the original floor area. Stairwells and double-volume entryways punish lazy angles, so measure twice and climb once.
Uniform spread also depends on spacing between units. A cluster of fixtures mounted at inconsistent heights creates a strobe effect for anyone walking beneath.
- Use a laser level to match heights across all units; the eye forgives a few millimetres, but physics does not.
- For flood lights indoor in long corridors, space each unit at half the beam throw distance so overlapping pools of light merge cleanly.
Check the mounting bracket bolts every six months. A loose arm allows the fixture to droop, shifting the beam pattern and undoing all your careful alignment.
Heat Dissipation and Ventilation Requirements
The irony of indoor flood lighting is that its worst enemy is the very thing it produces: heat. South African summers amplify this, and thermal management becomes the quiet arbiter of performance. A fixture mounted flush against insulation or a beam traps heat, leading to premature lumen depreciation and, in severe cases, catastrophic failure. Installation means respecting the thermal envelope. Leave a minimum gap of 10 centimetres between the fixture housing and any combustible material or void. If the unit is recessed, verify the IP rating for dust ingress, as clogged vents act as a down-filled jacket for the diode, cooking it from the inside out.
Safety extends beyond the fuse box. The electrical circuit must be rated for the inrush current, which is typically higher than the running wattage. A qualified electrician should verify the breaker size and the quality of the earth connection. For a comprehensive installation checklist, consider these points before powering up:
– Confirm the driver is accessible for replacement without dismantling the entire fixture.
– Check the gasket seals for compression marks, as a pinched seal invites moisture and corrosion.
– Test the thermal cut-off switch by dimming the unit and measuring the casing temperature after two hours.
Long-term performance relies on a breathing regime. Ventilation requirements are not a suggestion; they are a specification. Open-back housings allow hot air to rise and escape, whereas sealed units rely on the heat sink mass to dissipate energy. The drop in light output, known as the L80 rating, indicates the hours until brightness falls to 80 percent. If the ambient room temperature holds steady at 25 degrees Celsius, the fixture will last longer than in an unventilated attic hitting 40 degrees. Clean the fins quarterly with a compressed air blower to maintain optimal thermal transfer for your flood lights indoor.
Integrating with Smart Dimmer Switches and Timers
Pairing a dimmer with LED drivers cuts energy draw in near proportion to light output. At fifty percent brightness, my flood lights indoor draw half the power. That is a tangible saving, not a theoretical one.
Timers add another layer. They switch the dark hours automatically, which protects against forgotten lights and reduces thermal stress. A timer that keeps units off during the hottest part of the day also helps the driver stay cool.
- Confirm the dimmer switch matches the driver’s protocol.
- Use a timer with a battery backup to keep schedules during load shedding.
Smart scheduling works best when aligned with your daily rhythm. Long, steady intervals beat short bursts. Cycling a fixture every few minutes wears capacitors faster than a single sustained run. I set my flood lights indoor to stay on for at least thirty minutes per activation. This simple habit preserves the driver and keeps the light stable.
Cleaning and Maintaining High-Output Fixtures
Statistics show that nearly 80% of LED driver failures trace back to heat and debris accumulation. Surveying this reality before installation changes everything. For South African homes, where loadshedding creates voltage spikes during transition, the physical placement of your flood lights indoor matters as much as the chipset quality. I always recommend leaving a 10 centimetre gap between the fixture housing and any insulation material. This breathing room is not a luxury, it is a survival mechanism for the electronics inside. Secure mounting brackets to the joists, never plasterboard alone. Vibration from ceiling fans or passing traffic loosens connections over time, a precursor to arcing.
When you run cabling for these units, use a dedicated circuit with an earth leakage breaker. The combination of high output and constant switching demands a clean ground path. Protective gloves during installation prevent skin oils from contaminating the lenses. That fingerprint residue bakes onto the glass after the first hour of operation, creating a permanent dim spot. For units in garages or under eaves, add a small drip loop on the power cord to guide condensation away from the connector pins.
Long-term performance depends on your maintenance rhythm. Dust in the Highveld air or coastal salt in the Cape will coat the heatsink fins within a few weeks. A soft brush attachment on a vacuum cleaner handles the fixture body safely. For the lens itself, a microfiber cloth with a touch of isopropyl alcohol clears mineral deposits without scratching the coating. Twice a year, I check the torque on the mounting screws. Loose fittings cause micro-vibrations at 50Hz, which accelerates capacitor wear.
– Condensed air blaster for intricate crevices
– Silicone spray for hinge points and clips
– A soft bristle paintbrush for thermal fins
High output fixtures run hot by design, so monitor the ambient temperature around the mounting surface. A wooden beam that reads 40 degrees Celsius on a summer afternoon will push the driver past its rated limit. Painting the surrounding area white or silver reflects heat away, a cheap adjustment with measurable benefits. Keep the area clear of stored boxes or fabric, which act as thermal blankets. These steps ensure your flood lights indoor maintain their lumen output for the full rated lifespan, which is the real return on your investment.
Troubleshooting Common Flickering and Buzzing Issues
Flickering and buzzing in flood lights indoor rarely mean the LED chips are failing. More often, the culprit is a power supply struggling with South Africa’s grid instability. The constant switching during loadshedding cycles stresses the driver, causing it to emit a high-frequency hum. A simple test is to note whether the buzzing changes when you switch on a high-draw appliance, like a kettle. If it does, the issue is often electrical noise rather than a faulty fixture.
Driver voltage mismatches are another common trigger. Using a 12-volt unit on a circuit with significant voltage drop can cause a strobe effect. Before replacing the whole fixture, check the compatibility between the driver and the dimmer switch. Leading-edge dimmers are notorious for causing flicker with modern LED flood lights indoor. A trailing-edge dimmer often solves the problem completely.
For persistent issues, examine the wiring connections. A loose neutral wire creates arcing, which produces a visible flicker and a distinct buzz. This is a fire risk, so it warrants immediate attention. Torque settings on the terminal blocks are usually specified in the manual, a detail many installers skip.