
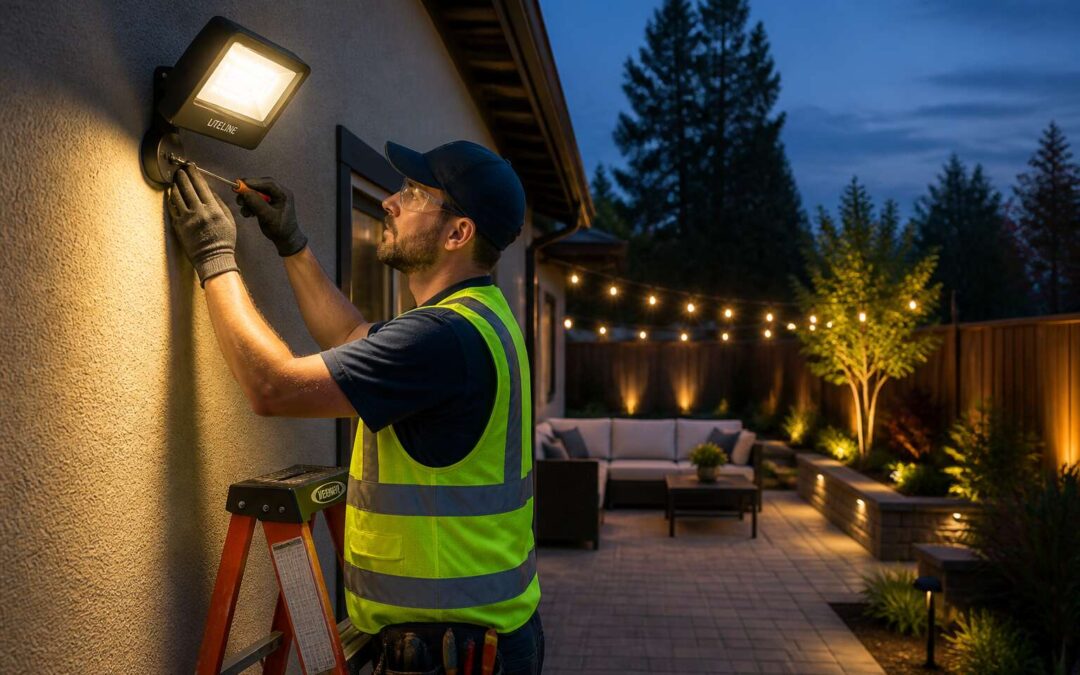
Mapping Out Your Outdoor Lighting Needs
Assessing the Area to Be Illuminated
The average suburban plot hides more shadow than you might expect. Poorly placed beams create bright areas while leaving critical zones dark. Before picking fixtures, walk your property at night and note every blind spot!
Assessing the area to be illuminated means looking at where you move and what you protect. Check the driveway, gate, side passages, and recessed corners. These are where intruders linger and where a single glaring light can blind your security camera. For flood lights installation to work, each fixture must cover a specific zone without spilling light onto your neighbour’s bedroom.
Here is what a practical survey covers:
– Distance from the ground to the intended mounting height.
– Reflective surfaces like paving or white walls.
– Direction of existing motion sensor triggers.
Your measurements today save you from relocating heavy fittings later. A thoughtful map reduces glare and energy waste. Flood lights installation is about targeting the right dark areas.
Choosing the Right Brightness and Color Temperature
Your security camera cannot see through glare. That is what happens when a 5000K floodlight with 4000 lumens sits over the gate. The camera clips the highlights, the intruder walks in shadow, and the neighbour complains about the glow.
Choosing the right brightness and colour temperature solves this. Warm white (2700K) flatters brickwork but hides detail. Cool white (5000K) exposes texture and improves facial recognition. Flood lights installation demands this distinction. One colour temperature everywhere creates monotony and wasted electricity.
- Distance to the target surface changes the required beam angle.
- Street lamp spill light can reduce your lumen needs.
- Continuous light and motion triggers serve different functions.
Brightness follows function. Security cameras need cool white for crisp footage. Living spaces need warm white for comfort. Flood lights installation means matching the Kelvin rating to the activity beneath it, from a Durban patio to a Cape Town driveway.
Determining the Number of Fixtures Required
Most properties need fewer fixtures than owners expect, or more. The difference is in the mapping. Divide your property into activity zones and security zones, then count each one separately. Flood lights installation depends on this arithmetic because one fixture rarely serves two purposes. A light over the braai area cannot also cover the side passage.
The shadowed spots only reveal themselves at night. A person can stand in any of them unseen. Each spot needs its own fixture.
A typical Johannesburg property needs four to eight units:
- two for the front and gate
- one for each side passage
- one for the back yard
- one for the braai area
Mounting height changes the arithmetic. A 5 metre pole spreads further than a 2 metre bracket, so fewer fixtures cover the same ground. The final flood lights installation count only makes sense once the mounting heights are set.
Selecting Between Wired and Solar-Powered Units
Walk your property at midnight. I have done this more times than I care to admit. It remains the only honest map of your lighting needs. The shadows reveal themselves without prompting. Pencil in every entry point, every stretch of paving, every blind corner where a person could pause undetected. This map becomes the blueprint for your flood lights installation.
The first decision is the power source. Wired units deliver steady output regardless of the weather. They suit properties with existing conduits and walls that allow cable chasing. Solar units offer independence from load shedding. They work well for remote structures like garden cottages or pool houses. Solar panels need northern exposure to perform properly.
Here is the practical test:
- Identify which areas need illumination every night without exception.
- Identify which areas only need occasional coverage.
- Match wired units to constant zones and solar units to occasional ones.
A hybrid approach fits most Johannesburg homes. The map decides which zones deserve which power source, shaping your flood lights installation before you commit.
Planning Power Source Accessibility
The map you created at midnight now meets the practical limits of your property. The distance between your distribution board and each proposed fixture determines whether a wired solution is feasible. Voltage drop, trenching, and conduit chasing all narrow your options.
Survey each mounting point with these questions:
- Is there an existing weatherproof socket within a reasonable cable run?
- Does the wall construction allow concealed wiring without damaging face bricks?
- Is a northern roofline or pole available for solar panel installation?
Your flood lights installation depends on how these answers align with the shadows you marked. Properties with pool houses or staff quarters often sit far from the main electrical system, limiting the physical options for wired connections. Every constraint belongs on that map before a single fixture is chosen.
Essential Tools and Safety Equipment
Gathering the Necessary Electrical Tools
A loose terminal screw has caused more failed installations than any faulty bulb in my years of field work. That is why proper tooling matters as much as the flood lights installation itself. I gather everything within reach before climbing a ladder. The alternative is a frustrating trip back to the workshop!
At minimum, the electrical kit should include:
- An insulated voltage tester
- Wire strippers
- A crimping tool
- A power drill with masonry bits
- A spirit level
Safety equipment is just as essential. Safety glasses keep dust and debris out of your eyes. Heavy duty gloves protect your hands from sharp metal housings. Non-conductive footwear is wise when working near live circuits.
Selecting the Correct Wire and Connectors
Wire selection deserves more scrutiny than most homeowners give it. The correct cross-sectional area prevents voltage drop over long runs, especially when your flood lights installation spans a large garden or driveway. In South Africa, SANS 10142 governs the wiring standard for fixed installations, so look for that mark on your cable. Stranded copper wire handles vibration better than solid core in outdoor fittings.
Connectors must match the environment. Outdoor fixtures face UV radiation, rain, and heat. A simple electrical tape wrap will not survive a Highveld thunderstorm. Use IP65 rated junction boxes and glands rated for the cable diameter. I favour pre-filled gel connectors for underground runs; they resist moisture without requiring specialised crimping tools.
- Check the wattage of the fixture against the wire gauge
- Verify the insulation rating before burying any cable
- Match the connector type to the conductor material
Proper tooling still matters, but within the flood lights installation process, the wire itself is where shortcuts create permanent problems.
Using Personal Protective Equipment (PPE)
Treat every wire as live until proven dead. That maxim guides every tool you touch. During a flood lights installation, PPE is the margin that keeps a mistake from becoming fatal. Insulated gloves rated for 1000V and safety glasses protect against the two most common injuries: shock and airborne debris.
- Voltage detector pen to confirm a dead circuit before you begin
- Class E safety boots with reinforced toes for ladder and scaffold work
- Arc rated face shield for live connections
South African rain adds a third hazard. Wet skin lowers electrical resistance, turning minor leaks into lethal currents. Combine PPE with a dry workspace and a rubber mat underfoot. Treat your flood lights installation as a professional contractor would, because the consequences of a careless moment never fade.
Installing a Dedicated Circuit or GFCI Protection
South African homes often run outdoor lighting from existing wall sockets. That arrangement invites nuisance tripping and leaves your flood lights installation at the mercy of whatever else shares the circuit. A dedicated circuit, protected by a GFCI breaker, isolates the load and keeps moisture related faults from taking down your entire house.
Essential tools for this stage include a voltage tester, wire strippers, a fish tape, and a hammer drill. You also need a waterproof junction box rated for outdoor use.
- Turn off the main breaker before opening the distribution board.
- Route the cable through conduit to shield it from UV and physical damage.
- Connect the GFCI breaker according to the manufacturer’s wiring diagram.
The GFCI trips when it detects current leaking to earth. In a country with frequent thunderstorms, that protection is not optional. Pair it with surge protection if your area experiences voltage spikes. A properly installed dedicated circuit makes your flood lights installation safer and easier to troubleshoot later.
Checking Local Codes and Permits
The right tools and the right permissions separate a flood lights installation from a costly redo. A ladder rated for your reach, a stud finder for locating solid mounting points, and a torque wrench for tightening brackets without cracking fittings count among the essentials. Insulated gloves and a dust mask guard against electricity and masonry dust. In South Africa, permanent electrical work must comply with SANS 10142, so your flood lights installation may require a Certificate of Compliance. Municipalities often restrict light spillage and bracket height, so obtain approval from your local authority before cutting into your walls.
- Confirm whether your municipality requires a permit for outdoor electrical work.
- Verify your planned wiring meets SANS 10142 standards.
- Check neighborhood restrictions on light direction and mounting height.
Trust me, this diligence is not bureaucratic hesitation. It prevents a failed electrical inspection at resale and keeps the peace with neighbours over stray light.
Preparing the Work Area for Safe Access
Preparing the work area demands vigilance. Clear the ground of leaves, loose stones, and forgotten tools before you begin a flood lights installation. Spread a drop cloth to catch grit that would otherwise fall into the open junction box. Mark buried cables and water lines with flags; the soil reveals nothing.
Safety equipment extends beyond gloves. A hard hat deflects falling debris from the eaves. Non-conductive footwear isolates you from the ground. Set the ladder on firm soil, never a muddy slope.
- Inspect the ladder rails for cracks.
- Lock the spreader arms.
- Have a second person steady the base.
Each action is deliberate. The dusk settles, and the work proceeds without error.
Electrical Wiring and Connection Best Practices
Connecting to a Weatherproof Junction Box
Most electrical faults in outdoor lighting do not originate in the fixture itself. They begin inside a junction box that was sealed in haste. That is where your flood lights installation lives or dies.
When tackling flood lights installation, the junction box demands your full attention. I have watched seasoned DIYers fumble here. Ensure the box carries an IP65 rating or higher. Strip your wires to about 10 mm and use ferrule connectors to prevent stray copper strands from causing a short circuit. Inside the box, arrange your connections with deliberate care:
– Leave sufficient slack for re-termination
– Use wire nuts or Wago connectors rated for outdoor use
– Tuck the connections neatly to avoid pinching the insulation
Then, seal the gland properly. A loose gland invites moisture, which corrodes terminals and compromises your entire flood lights installation. Finally, test each circuit before sealing the box completely.
Running Underground Cable with Proper Conduit
The underground leg of any flood lights installation is unforgiving. Sun, rain, and load-bearing soil all conspire against exposed cables. Burying them directly is a gamble with a short lifespan. Conduit is not an accessory; it is the primary armour.
Use rigid PVC conduit rated for underground burial. Lay it at a depth of at least 600 mm. That places it below the frost line and most spade work. Plan the route with sweeping bends, never tight 90-degree corners. Pulling wire through a kinked pipe is a frustrating exercise in futility.
Consider the practical steps for a clean run:
1. Dig a straight trench, keeping the bottom free of sharp stones.
2. Lay the conduit with a slight gradient to drain moisture.
3. Prime and glue all joints with solvent cement.
4. Pull the cable through and leave a service loop at each end.
Keep the conduit entry points sealed. The junction box and the lamp housing should both be watertight. A missing grommet here turns your conduit into a pipe for water travel. Check the alignment before backfilling. Shifting soil can crush a poorly supported pipe, a failure that is silent and expensive to repair. A meticulous underground phase secures the entire flood lights installation.
Splicing Wires Securely with Waterproof Caps
When you finish pulling cable through conduit, the real test begins at the connections. Every splice inside a flood lights installation must survive rain, humidity, and temperature swings. Electrical tape will not last a season. Use waterproof twist-on caps filled with silicone sealant.
I prefer to strip exactly 13 mm of insulation. Too much exposed copper invites corrosion. Too little makes a weak grip.
Here is a quick sequence that works:
- Shut off power and verify with a tester.
- Match wire gauges and types.
- Hold wires parallel, cap them, and twist until snug.
- Pull gently to confirm the bond.
Then wrap the splice with self-amalgamating tape, stretching it as you go. That tape fuses into a watertight blob. Finally, tuck the splices into the junction box with no strain on the terminals. A loose connection creates heat, and that heat can ruin any flood lights installation.
Grounding the System Correctly
The green and yellow wire is not a fashion accessory. It is the only conductor that matters when lightning finds your fence line or a cable gets nicked by a stray spade. In South Africa, where thunderstorms arrive without warning, a proper earthing path is the difference between a tripped breaker and a hospital visit.
Grounding the system correctly means running an uninterrupted earth conductor from the distribution board to every fixture. The earth lug in the junction box is the destination. The conduit is not an acceptable substitute for a continuous copper path. It corrodes, works loose, or simply acts as a poor conductor when it matters most.
A flood lights installation demands attention to three separate earth points:
- The main earth terminal at the distribution board.
- The junction box earth lug for each cable run.
- The fixture’s dedicated earth screw.
All three must be present for the circuit to work.
Mounting and Positioning Strategies for Maximum Coverage
Choosing Mounting Heights for Wide-Angle Illumination
Mounting height determines the reach of your flood lights installation. A fixture perched too low creates harsh pools of light, while one set too high sacrifices intensity for spread. The ideal range often sits between 2.4 and 3.6 metres for residential perimeters, allowing the beam to wash across driveways and garden walls without blinding passersby.
Wide-angle illumination demands a deliberate tilt, usually 15 to 30 degrees below horizontal, to overlap adjacent beams and eliminate dark gaps. For larger commercial yards, consider a vertical arrangement that staggers fixtures at alternating heights. This approach uses the inverse square law to your advantage, sustaining even lux levels across uneven terrain.
- Position the housing away from reflective surfaces to prevent glare backscatter.
- Align the sensor or photocell to face north, avoiding false triggers from passing headlights.
The geometry of your space, not the wattage alone, defines the outcome. Adjusting elevation by even twenty centimetres can transform the result dramatically!
Adjusting Fixture Angles to Minimize Glare and Dark Spots
Positioning fixtures is a quiet arithmetic of shadows and angles. A flood lights installation succeeds when each beam greets its neighbour with a gentle overlap, not a hard edge. Place units at corners rather than flat wall centres, allowing one housing to wash light across two planes at once. This simple shift reduces the number of fittings needed while extending the usable pool of illumination.
Glare appears when the naked eye meets the source directly. Tuck the housing behind eaves, parapets, or a low garden wall to keep the lamp invisible while the beam still reaches its target. For pathways, stagger opposing units so their pools interlock along the walk.
- Fit baffles or visors to sharpen the beam edge
- Point motion sensors away from street traffic
- Test angles at dusk when contrast is most visible
Dark spots form where beams separate. A tilt of roughly 30 degrees between adjacent fixtures usually closes the gap. Walk the perimeter at night before final tightening. Adjust, observe, repeat. The finished sweep of light should feel continuous, with nothing left to guess.
Spacing Multiple Units for Even Light Distribution
Spacing multiple fixtures is less about symmetry and more about preventing the moon from giving up on your yard. In South Africa, where load shedding makes darkness a recurring guest, proper flood lights installation means treating each unit like a stubborn house cat. You place it where it serves you, not where it looks pretty. The golden rule is to measure overlap, not distance. If beams do not intersect by at least one third, you will host a disco of dark spots.
For maximum coverage, stagger fixtures at different heights rather than lining them up like soldiers. This creates a cascading effect that evens out shadows. Consider these spacing tactics:
- Use the fixture’s beam spread to calculate spacing, aiming for 30 percent overlap.
- Mount units at corners to cover two planes simultaneously, reducing total count.
Remember, the goal of flood lights installation is to banish guesswork. Your eyes at dusk are the best sensor. Walk the perimeter, adjust the mounts, and let the light fall where it should.
Securing Brackets to Different Surface Types
Mounting brackets to brick or concrete demands the right anchors. Rawl plugs alone will not hold under vibration. Use masonry anchors with a hammer drill, and match the bolt length to the bracket’s depth. For wooden fascias, stainless steel lag screws resist rust from humid coastal air. If you are mounting to weatherboard or corrugated iron, use spacing blocks to avoid crushing the profile.
Positioning matters before you tighten anything. A bracket fixed too close to a wall corner creates a beam that scrapes the surface, wasting light. Tilt the bracket base outward by ten degrees so the beam washes over the yard instead.
For multi-unit setups, a simple sequence prevents rework:
- Mark all bracket holes before drilling, never one at a time.
- Fit the first unit, then check the beam overlap with the next.
- Adjust the bracket angle before final tightening.
This order keeps flood lights installation clean and spares your wall from needless holes.
Using Motion Sensors for Efficiency and Security
Mounting height and sensor placement work as one system. A sensor set too high reads only heat, not motion. Set too low, it wakes for every passing cat. For most South African properties, two and a half meters balances detection with false alarm resistance.
Angle the sensor head toward the path of approach, not the street. This keeps your flood lights installation efficient, triggering only when someone enters the yard. A sensor facing straight ahead misses movement creeping in from the side, which leaves corners open to surprise.
- Orient the sensor perpendicular to the main walking route
- Tilt the head downward to avoid distant triggers
- Test the range at night before locking the bracket
Coverage without discrimination becomes noise. The sensor’s field of view defines the actual perimeter, and every degree of misalignment changes what the light sees. A proper flood lights installation matches the sensor’s gaze to the ground, the path, and the gate, nothing more.
Aligning Photocell Sensors to Avoid False Triggers
A photocell sensor with poetic ambitions triggers for every passing cloud. That is nuisance, not security. For proper flood lights installation, position the sensor to see the sky’s dimming glow, not your neighbour’s lamp or a minibus taxi’s beam. South African dusk drops quickly, so angle the sensor toward the horizon, not the driveway.
Height and angle form a contract. Set the sensor low enough to catch the horizon’s dimming, high enough to ignore ground reflections. A sensor locked onto a streetlight becomes a false trigger enthusiast. Face it away from the setting sun’s direct glare, or prepare for unscheduled light shows.
- Keep the sensor clear of reflective windows.
- Reduce the sensitivity dial, then test across two nights.
- Check for swinging branches that throw moving shadows.
That list saves you from cursing at a sensor. Correct alignment makes your flood lights installation respond to intruders, not to moths.
Final Checks, Testing, and Maintenance Tips
Testing the System Before Sealing All Connections
The moment of truth arrives before you seal anything. Power up the circuit and watch each fixture for a full minute. A flickering LED or a humming transformer exposes problems no multimeter reading will reveal. This pre-seal test is the final step in a flood lights installation. Wiggle each wire gently while the circuit is live to uncover poor splices.
Once everything behaves, seal the connections with dielectric grease and close the housings. Revisit the system after 24 hours of weather exposure. Condensation inside the lenses signals a failed gasket. For a flood lights installation near the coast, salt air corrodes terminals quickly, so inspect every exposed screw yearly.
During maintenance:
- Clean lenses with a damp microfiber cloth, never solvents
- Re-torque bracket bolts, since wind vibrations loosen them
- Test photocell response by covering the sensor, not by waiting for dusk
Weatherproofing Exposed Components
Most flood light failures happen after the installation, not during it. The culprit is moisture sneaking into unsealed crevices. For a flood lights installation, the final stage demands rigorous weatherproofing of every exposed component.
Apply dielectric grease to terminals and silicone sealant around screw heads. Fit a rubber boot over the photocell connector. After 24 hours of real weather, check each fixture for condensation. Coastal salt air accelerates corrosion, so inspect annually.
- Clean lenses with a damp microfiber cloth, never solvents
- Test photocells by covering the sensor, not waiting for dusk
- Re-torque bracket bolts after windstorms
Your system’s longevity depends on these mundane checks. Neglect them, and you will be back on a ladder sooner than planned.
Cleaning Lenses and Adjusting Aim Over Time
A flood lights installation depends on the care it receives after the final screw is tightened. Step back and observe the beam pattern at night. Walk the perimeter, note any dark pockets or harsh glare. Testing each sensor and timer once more prevents surprises.
Over time, lenses gather dust and pollen. Clean them with a damp microfiber cloth, never abrasive cleaners. The aim shifts too. Brackets loosen from wind, or new foliage grows into the light path. Re-aim the fixtures to match your original layout.
Maintain a simple rhythm:
- Check lenses monthly for grime
- Tighten bracket bolts every season
- Confirm the photocell responds to a covered sensor
These rituals extend the life of your system. A few minutes of attention saves hours of ladder work later.
Inspecting Wiring for Wear and Changing Conditions
A flood lights installation can fail silently long before a bulb blows. The culprit is usually worn wiring. South African summers bring intense UV radiation. Winters bring cold fronts. Both degrade insulation over time. I always run my fingers along the cable sheathing, feeling for brittleness and cracks. It sounds fussy, but it works!
- Look for discolouration near connectors
- Check for exposed copper at bend points
- Confirm cable clips still grip firmly
Changing conditions affect sensors and timers too. A tree that grew last season may now block the photocell. Burrowing animals can shift buried conduit. Re-test the system after severe storms. The system survives because someone pays attention to these small details.
Upgrading to Smart Controls for Remote Management
Before you declare the job complete, run a full operational sequence. Switch the circuit on and watch each fixture cycle through its sensor triggers. Walk the perimeter at dusk to confirm coverage matches expectations. Small adjustments to a sensor head make the difference between a floodlight that protects and one that annoys. In any flood lights installation, this commissioning matters as much as wiring.
I now use smart controls on my own installations to sidestep this guesswork. A Wi-Fi connected relay provides live status updates on your phone, so you can confirm each unit is active without climbing a ladder. For a flood lights installation in South Africa, load shedding schedules make this particularly valuable:
- Check which units returned after an outage
- Reset a tripped circuit remotely
- Review runtime logs for early failure signs
Most systems log runtime, helping you catch deterioration before a dark yard becomes a risk.