
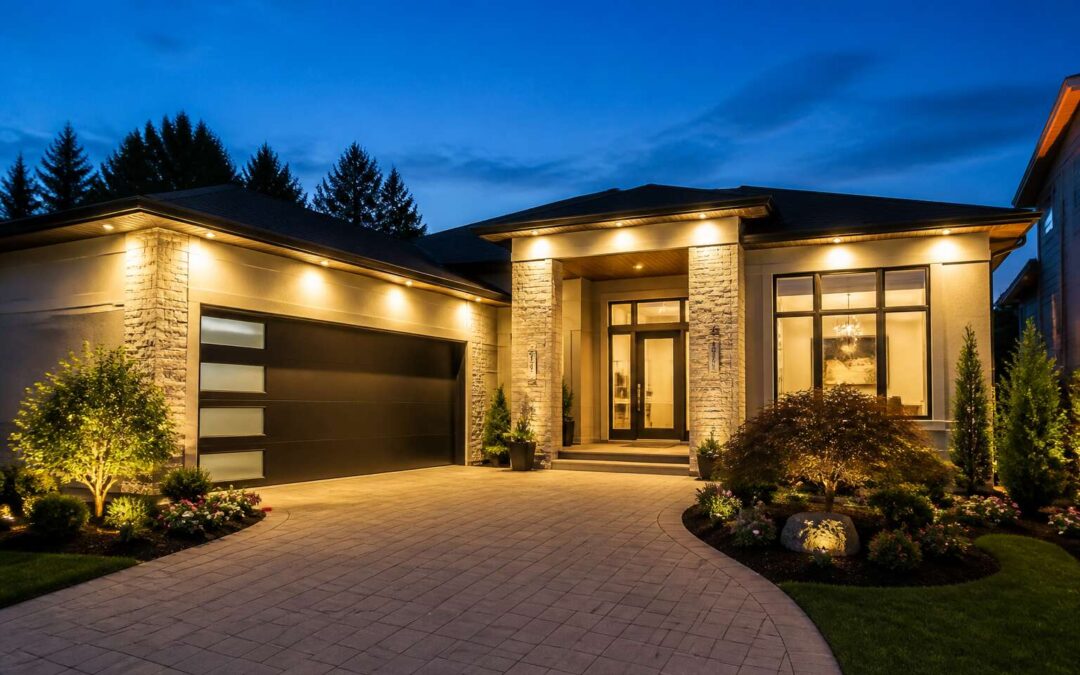
Evaluating the Benefits of Residential Flood Lighting
Deterring Unwanted Intruders with Perimeter Illumination
A pitch-black yard offers an intruder the illusion of anonymity. In South Africa, where load shedding often plunges suburbs into darkness, relying on moonlight is a dangerous gamble. Flood lights for home break this veil. I have stood in these darkened yards, and the moment perimeter illumination activates, the dynamic shifts.
The true benefit is the disruption of the intruder’s internal script. They rely on darkness, and mistakes. Consider how the light psychologically disrupts the sequence!
- Exposure breaks the planning phase.
- Light triggers a flight response before entry.
- It forces rapid, detectable movement.
That is the core evaluation. The intruder sees themselves being watched. Installing flood lights for home means turning your property into a stage where every motion is an action with consequences.
Improving Safety Along Walkways, Steps, and Driveways
Slips, trips, and falls account for a significant portion of household injuries each year. The humble walkway becomes a treacherous ravine when swallowed by the night. Uneven paving stones hold hidden dangers. A misplaced step on the driveway can lead to a sprained ankle or a fractured wrist. The driveway itself presents a daily gauntlet after sunset.
Residential flood lighting for home exteriors converts these perilous zones into safe passageways. Targeted illumination reveals the subtle cracks and height changes that cause accidents. When you pull into your garage after a long drive, a well-lit path eliminates guesswork. Carrying groceries, children, or elderly relatives becomes a secure, deliberate action.
Consider what proper lighting achieves:
– It exposes wet leaves and slippery patches
– It outlines the edges of steps and curbs clearly
– It removes deep shadows where hazards hide
Strategic placement near doorways and along the garage overhang casts a broad, even wash of light. This allows your eyes to adjust quickly and judge distances accurately. During load shedding, this is even more critical; a battery-backed system offers continuity. The result is simple; you walk with confidence, unburdened by the fear of a fall. This form of safety is tangible and immediate, present every single evening.
Highlighting Landscaping, Facades, and Outdoor Artwork
Most of us invest heavily in landscaping, yet we only see the results for a few hours each week. By the time evening arrives, the garden fades into a featureless dark. Flood lights for home exteriors reverse this loss. A single warm beam directed at a mature acacia reveals the ridges of its bark. Uplighting along a stone facade exposes the texture that disappears during the day. Outdoor artwork, a metal sculpture or a ceramic wall piece, gains a second presence after sunset.
The benefits of this approach are immediate:
- The geometric patterns of a tree canopy cast against a wall
- The grain and relief of stone, timber, or plaster finishes
- The reflective quality of water features and metallic artwork
The property does not end at the front door. It continues into the darkness, and flood lights for home bring that continuation into view.
Extending Sundown Hours for Evening Recreation
According to a recent survey, the average South African homeowner spends less than 30 minutes per evening outdoors, a figure that drops dramatically during the winter months. The sun sets early, and with it, the desire to remain in the garden often vanishes. This is a loss of usable living space. By installing flood lights for home, you reclaim those hours. The boundary between the interior and the exterior dissolves, and the patio, the pool area, or the braai spot becomes a legitimate extension of the house.
Consider how this changes a weekday evening. Dinner can be moved outside, not as a special treat, but as a standard routine. The light allows for a late-night swim or a short session of reading on the veranda. It creates an arena for those moments of quiet leisure that often seem impossible to fit into a busy schedule. This simple addition to your property directly increases your return on the space you already own.
The practical benefits are numerous and immediate. A well-lit backyard enables a variety of activities without breaking the natural ambience.
– Extended time for family sports and games after sunset.
– Creation of a comfortable atmosphere for evening social gatherings.
– Ability to continue outdoor hobbies or gardening tasks into the night.
– Provision of adequate illumination for outdoor cooking areas.
The investment in flood lights for home is an investment in your daily life, not just your property value. It transforms the twilight hour from a limit into an opportunity. The darkness no longer signals the end of the day, but rather the beginning of a different, more peaceful phase of it, right in your own backyard.
Critical Considerations Before Making a Purchase
Measuring Brightness: Lumens and Lux Explained Simply
Most homeowners still shop for flood lights by wattage, a habit that reveals very little about actual visibility. Wattage tells you energy consumption, not the quality of light you will see across your property. The two metrics that truly define performance are lumens and lux, and understanding the difference transforms how you approach outdoor illumination.
Lumens measure total light output. A flood light for home use that emits 1,000 lumens produces a specific amount of light in all directions. Lux, however, measures illuminance on a surface area. One lux equals one lumen spread across one square meter. This distinction matters because a powerful flood light for home placement can still appear dim if the beam disperses too widely across a large yard.
– Lumens answer the question of total brightness.
– Lux answers the question of perceived brightness at a distance.
– Beam angle determines how those lux values distribute across your space.
Consider a narrow driveway versus a wide entertainment area. The same flood light for home installation can deliver adequate lux along a focused path while falling short across an open lawn. South African properties often feature significant distance between the house and boundary walls, which demands careful attention to lux values rather than raw lumen counts. The inverse square law states that light intensity diminishes with distance, so a fixture that looks brilliant at three meters may lose half its punch at five meters.
The practical takeaway is simple. Match the lumen output to the intended area size, then verify the beam spread will actually deliver sufficient lux to the critical zones you need illuminated. This approach yields a lighting scheme that feels intentional rather than accidental, a quiet certainty that your outdoor spaces will perform exactly as envisioned when dusk settles over the Highveld or the Cape coast.
Choosing the Right Color Temperature for the Render
Color temperature decides whether your flood lights for home create an inviting atmosphere or a sterile one. Measured in Kelvin, this setting shifts the entire character of your outdoor space. Most South African homeowners default to a single option without considering how different areas of the property require different moods. A security-focused installation near the boundary wall demands a crisp, cool white that reveals details sharply. An entertainment area calls for something warmer.
The choice comes down to what you want the light to do for you at nightfall.
– Warm White, around 2700K to 3000K, softens textures and flatters stonework and timber.
– Cool White, roughly 4000K to 5000K, suits task lighting and active zones.
– Daylight, exceeding 5500K, mimics midday conditions but can feel harsh.
Consider the Highveld’s distinctive dusk light. That lingering amber glow before darkness takes hold. Matching your flood lights for home to that transitional moment creates a seamless shift from day to evening. Overly cool fixtures on a Cape Dutch facade can look clinical. Warmer temperatures blend better with earthy tones of brick and plaster. The render on your walls reflects light differently at each Kelvin setting. Test a few options before committing to a full installation. Your eyes will tell you which temperature feels right. That small detail separates a thoughtful lighting plan from a purely functional one.
Understanding Beam Spread and Coverage Angles
Purchasing flood lights for home use often comes down to wattage and price, yet the beam angle determines what you actually see. A narrow beam of 15 degrees might punch light across a long driveway, while a wide 120 degree spread washes over a small courtyard. Choosing the wrong one leaves either blinding hotspots or gloomy corners.
The coverage angle is the forgotten specification. Many shoppers pick up a fitting and assume it will illuminate everything in front of it. That assumption fails when you mount a unit high on a wall. A fixture with a tight beam aimed downward creates a bright pool with harsh shadows beyond it, which defeats the purpose of perimeter visibility. A wider angle, around 60 to 100 degrees, suits most residential boundaries because it spreads light evenly along the ground plane.
Consider the distance from the fitting to the surface you want lit.
1. Measure the mounting height and the desired lit width.
2. Divide the lit width by the distance to get the approximate beam angle needed.
3. Add 10 degrees as a safety margin for glare reduction.
That simple calculation protects your purchase against a common mistake. I have seen installations on farms outside Pretoria where a narrow spot beam was fitted to cover a 20 metre fence line. The result was a small, intense circle that left the rest in darkness. A wider beam would have covered the full stretch with a fraction of the perceived brightness.
For flood lights for home use, the beam spread also affects how neighbours experience your property. A tight beam creates harsh contrast. A wider spread softens transitions and reduces dark zones where movement becomes difficult to detect. Look for fittings with adjustable heads or interchangeable lenses. That flexibility lets you fine tune the coverage after installation without replacing the entire unit.
The beam angle also interacts with the wall material you are lighting. Rough plaster scatters a tight beam quickly, while smooth painted surfaces reflect it further. Remember this when positioning fittings near textured cladding or exposed brick. The same fixture can behave differently depending on the surface opposite it. Take a minute to visualise the space used for evening braais or parking. A flood light with a 90 degree spread mounted at 3 metres will cover roughly 6 metres of ground. That simple relationship guides most residential decisions.
Checking Weather Resistance Ratings for Outdoor Use
August’s southeaster battered Cape Town’s outdoor fittings so severely that several retailers reported a surge in warranty claims. Yet most homeowners never inspect the ingress protection number before mounting flood lights for home.
The first digit denotes dust resistance. The second determines how much water the casing can withstand. Coastal salt mist corrodes cheap casings within two seasons, and Highveld thunderstorms drive rain upwards into poorly sealed housings.
Three details deserve close inspection:
- The two digit IP code printed on the housing
- Whether the gasket is replaceable or moulded shut
- The warranty terms covering corrosion and UV damage
Integrated LED units with sealed optical chambers resist moisture better than bulb-and-holder designs. Polycarbonate lenses survive hail but yellow under intense African sunshine. Powder coated aluminium handles heat better than untreated steel.
Comparing Hardwired, Solar-Powered, and Battery-Operated Models
Choosing flood lights for home demands a power source decision before you touch a mounting bracket. Hardwired systems supply constant voltage, yet they require an electrician and often a new circuit.
Solar panels free you from cabling, but their output collapses during extended overcast spells. Battery units install in minutes, though each pack lasts roughly 200 cycles in warm climates.
The real difference emerges in maintenance.
- Hardwired: inspect connections yearly
- Solar: clean panels quarterly, replace battery every 2 to 3 years
- Battery: recharge cycles dictate lifespan
I have watched homeowners choose solar for convenience and regret it after two winters. Conversely, hardwired fixtures offer stability but lock you into a fixed position. The cost of replacement parts often goes unmentioned until the first failure.
Comparing Light Bulb Technologies for Outdoor Illumination
LEDs vs. Halogen vs. Fluorescent: Key Differences
Choosing the right technology for your flood lights for home is about more than just picking the brightest option. It is about understanding how each bulb behaves after years of Karoo dust storms and Highveld thunderstorms. The three main contenders, halogen, fluorescent, and LED, each have a distinct character that affects your monthly bill and your sense of security.
Halogen lights have a familiar, warm glow that cuts through the darkness instantly. However, they are essentially glorified heaters, wasting vast amounts of energy to produce that light. Fluorescent units offer better efficiency, but they can suffer in cold weather and often have a slight delay before reaching full brightness. This is a small detail when you are waiting for a light to flood the yard after hearing a noise.
LED technology, on the other hand, has become the standard for most homeowners, but the differences are worth considering:
– Halogen: Cheap to buy, but expensive to run and they have a short lifespan.
– Fluorescent: More efficient than halogen, but sensitive to cold temperatures and prone to flicker.
– LED: Higher upfront cost, yet they use less power, last for years, and turn on instantly.
The real distinction sits in the daily interaction. A halogen flood light for home use gives you immediate, piercing illumination, but it demands frequent bulb replacements from a ladder. Fluorescent tubes can hum and buzz, which detracts from the peace of a quiet evening. LEDs have largely solved these issues, but you need to check the colour temperature, as a high Kelvin rating can feel stark and clinical against the natural landscape of your garden.
Lifespan and Energy Cost Breakdown by Technology
The arithmetic of outdoor lighting often surprises homeowners. The initial purchase price of a bulb is a fraction of its true cost, which is the energy it consumes over its lifetime. This is where the disparity between technologies becomes profound. Consider a standard scenario: two flood lights for home use, positioned on a garage eave, switched on every evening. One houses a halogen lamp, the other an LED. After a year, the difference in the electricity bill becomes a quiet, persistent reminder of the initial choice.
Energy costs in South Africa have seen consistent upward adjustments, making the efficiency of your fittings a matter of household budgeting. The cost breakdown is stark:
– Halogen: These units convert roughly 10% of energy into light, with the rest radiating as heat. They also require frequent replacement, adding to their operational cost.
– Fluorescent: They fare better on energy use, but their susceptibility to cold and inclination to flicker can shorten their effective lifespan in exposed outdoor fittings.
– LED: While the shelf price is highest, a typical LED flood light for home security use can operate for over 25,000 hours. This longevity, paired with a drastic reduction in wattage, delivers a return on investment within the first year of operation.
The lifecycle cost is the true measure. A halogen unit may cost a fraction of an LED to place in the trolley, but it will demand a ladder, a new bulb, and a steady stream of added kilowatt hours. The LED remains fixed to the wall, turning darkness to light for a decade without complaint. This is the difference between paying for temporary brightness and investing in a permanent solution. The choice for the practical South African homeowner is clear when the figures are laid out on the table.
Dimming Capabilities and Start-Up Reaction Times
Conventional starters hiss and flicker before settling into a steady glow. Halogen technology responds instantly, but it offers almost no dimming flexibility without expensive, bulky transformers. This is why many homeowners still tolerate the heat and inefficiency; they crave that immediate blast of light.
Fluorescent units are worse. They struggle in cold weather, delaying full brightness for minutes. Dimming them requires special ballasts that often cost more than the fitting itself.
– Halogen: Instant on, but only dimmable with magnetic transformers. Flicker is common.
– Fluorescent: Slow start, especially in winter. Dimming compatibility is poor.
– LED: Instant full brightness. Most modern units are triac dimmable without extra hardware.
LED technology solves both problems. These flood lights for home units reach full output in under a second, and dimming is usually smooth and silent. You walk to the switch, press it, and the yard is illuminated. No warm-up, no buzz, no hesitation. The control you have over the light level changes how you use the space, from a soft glow for evening relaxation to a full security wash when needed. When you choose LED, the light obeys your command, not the weather or the quirks of an outdated ballast. Pressing the switch and having immediate, controlled light is the standard bearer for modern outdoor fittings.
Effective Positioning and Installation Practices
Identifying Mounting Heights, Coverages, and Key Perimeter Zones
Light scaping begins with a single decision that reshapes the entire nighttime silhouette: the mounting point. A floodlight bolted at eye level creates glare, not guidance. For flood lights for home use, the sweet spot rests between nine and twelve feet above the ground. This height lets the beam wash downward across patios and yards without spilling into the street or startling neighbours. At this elevation, coverage widens while shadows retreat, turning a dark corner into a measured space.
Calculating the spread requires more than checking the fixture’s beam angle. Every surface absorbs or reflects light differently. A rough concrete wall scatters photons, while dark brick swallows them. Consider the distance from the fixture to the furthest critical point, then adjust the tilt accordingly. In practice, this often means angling the head downward at roughly 45 degrees. This configuration delivers even illumination across a driveway or rear wall, eliminating the pockets of blackness where movement becomes ambiguous.
When mapping key perimeter zones, prioritise the points of entry first.
1. Front and back doors, where a person pauses to fiddle with keys.
2. Garage side entrances, often shielded from the street.
3. Side passages between buildings, which funnel foot traffic.
4. The far corners of a boundary wall, where a light mounted high covers both the fence line and the adjacent ground.
Each of these locations benefits from a dedicated fixture with a clear line of sight to the intruder’s approach path. Avoid mounting lights directly above the doorframe, as this creates a blinding halo around the visitor while leaving the porch floor dark. Instead, set the fixture two to three feet away from the opening, angled back toward the entrance. This subtle offset keeps the faces of people visible while still drenching the threshold in light.
Pairing a wide wash for the yard with a focused beam for the pathway often yields better results than one oversized unit. Dual-head fixtures make this simple, allowing one lamp to cover a broad area while the other concentrates on a narrow strip. The result is a layered defence, where the bright zones connect seamlessly enough that the viewer never notices where one stops and the next begins.
Offsetting the Light Angle for Optimal Footprint, Maximized Vision
Most installers treat the floodlight head like a fixed object, something to tighten and walk away from. That single decision often ruins the entire outdoor lighting scheme. The tilt, not just the height, determines whether the beam becomes a useful tool or a blinding nuisance. When mounting flood lights for home use, think about where the glare will land before you touch a single screw. Light that strikes a neighbour’s bedroom window or bounces off a car bonnet does nothing for security. It simply creates a public nuisance and a wasted electricity bill.
The physics of light scattering demands a deliberate approach. A fixture aimed straight out from the wall projects most of its output into the middle distance, leaving the area directly below the unit in complete darkness. This creates a harsh contrast that actually impairs vision. The human eye struggles to process detail in deep shadow immediately adjacent to a bright source. Angling the head downward at roughly 15 degrees from horizontal solves this. The beam then sweeps across the ground in a graduated wash, illuminating the full length of the wall and the approach path simultaneously. This subtle adjustment transforms the footprint from a useless hotspot into a practical, evenly distributed pool of light.
One overlooked element involves the relationship between the fixture’s housing and the mounting surface. Flood lights for home installation on dark eaves or beneath soffits absorb significant light output before it ever reaches the ground. Light coloured mounting blocks or small metal spacers that hold the fixture slightly proud of the surface can redirect that lost output. The same principle applies to the lens itself, regular dust and insect buildup can reduce output by nearly a third within a few months of coastal exposure. A quarterly wipe with a damp cloth preserves the original performance without any re-aiming required.
A common mistake involves placing the fixture so that the beam crosses the path of someone approaching the house. This creates a silhouette effect, outlining the visitor while leaving their face in shadow. The viewer instinctually squints, and the security benefit collapses. Instead, position each unit so the light travels along the same line as the expected approach, not across it. This side-lighting technique reveals facial features and clothing details while keeping the light source out of the observer’s direct line of sight. The results feel almost effortless, the space appears naturally lit rather than interrogated.
Before switching on the power, walk the perimeter with a handheld lamp and mark the exact spots where shadows pool. These are the locations where an intruder would likely pause or hide. Then adjust each fixture to eliminate those specific pockets of darkness. Sometimes this means loosening the swivel bolt and shifting the head by a few degrees. The effort takes minutes but delivers a marked improvement in coverage and peace of mind. That is the real purpose of outdoor illumination, not decoration, but clear, unobstructed sightlines across every critical zone when the sun drops below the horizon.
Reducing Glare, Glare, and Spillover Effects, and Light Spillover
Positioning flood lights for home requires a conversation with your neighbours before you climb the ladder. A fixture that illuminates their bedroom at 2 a.m. is a relationship killer. The goal is to light your property, not the street or the house next door.
Glare happens when the bare bulb enters the line of sight. Shielded fixtures and downward angles keep the source hidden while the beam does its work. Spillover is the wasted light that escapes beyond your boundary. It serves no purpose and invites complaints.
Consider these practices:
- Use motion sensors to limit duration
- Choose shields or baffles to control the beam
- Test the angle at night from your neighbour’s side
Flood lights for home should be seen by their effect, not their source. I have yet to meet a neighbour who appreciates a free light show. If you can see the fixture clearly from the street, it is aimed wrong.
Planning Surface-Mount Wiring and Retrofitting Existing Systems
Load shedding has made every South African an expert on darkness. Yet most flood lights for home suffer from poor positioning and wiring shortcuts that surface months later. Surface-mount wiring on brick requires proper conduit, especially in coastal towns where salt air corrodes exposed cable. Retrofitting existing housings instead of replacing the whole fixture turns dated units into flood lights for home, but the junction box capacity often gets ignored. An undersized box accumulates heat and trips the circuit at the worst moment!
Position the fixture where wiring routes stay short and protected. A raceway painted to match your wall conceals conduit while shielding cables from UV and moisture. A dedicated outdoor circuit, separate from indoor plugs, prevents nuisance trips and speeds up fault-finding.
Mains connections belong to a licensed professional. The savings from DIY installation evaporate when a sparks bill arrives.
Setting Up Customized Zoning for Different Areas of the Yard
Effective positioning is a quiet art. A flood light for home aimed at the neighbour’s bedroom wall will cause more social friction than a garden hose aimed at a laundry window. The goal is to create an arrangement where each unit serves a purpose without announcing itself to the entire suburb. In my practice, I recommend placing fixtures at the corners of a structure, not in the middle of a wall. This creates a wide beam that sweeps across the area, eliminating pitch black pockets.
Customized zoning requires an honest assessment of how you actually use your yard. The braai area needs brighter, warmer light. The vegetable patch needs a cooler, softer glow. The driveway needs a narrow beam, focused on the gate. Rather than installing a single powerful fixture, break the space into distinct zones. Consider these criteria:
– Frequency of use during evening hours
– The specific activity taking place in each zone
– The proximity to bedroom windows and the neighbour’s fence
This method prevents the common mistake of over-lighting everything. A well-zoned system uses fewer fixtures and less energy, while providing better illumination where it truly matters.
Understanding Grounding, Installed Position, and Enclosure Safety
Most contractors treat a flood light for home installation as a simple wiring job, yet the physical placement and protective housing dictate performance more than the bulb itself. Grounding is the first line of defence against surges and moisture ingress. A proper earth connection channels stray current safely into the soil, protecting both the unit and the circuit breaker. Always verify that the mounting bracket has a dedicated ground wire bolted to a clean metal surface, never relying on paint or rust for conductivity. In South Africa, where thunderstorms arrive with little warning, an earth leakage unit is not an accessory, it is the baseline.
Positioning matters because a fixture mounted too high creates a narrow, intense hotspot, while one mounted too low throws blinding light across a wide arc. The sweet spot for a flood light for home sits at roughly 4 to 5 metres above the ground, angled downward at 15 degrees. This setting reduces glare while extending coverage across the patrol zone. Before locking the bracket, rotate the head and sweep the beam across the intended area; make adjustments while holding the unit, then tighten all bolts once satisfaction is reached.
Enclosure safety involves inspecting the housing gasket and cable gland during installation. A small tear in the rubber seal allows water to creep inside, corroding the terminals and causing flicker. Verify the ingress protection rating matches the installation environment:
– IP65 for wall mounted units exposed to rain
– IP66 for coastal areas with high salt spray
– IP67 for ground level installations prone to pooling water
Replace any worn gasket immediately, as the seal, not the lens, keeps the electronics alive. Respecting these installation disciplines transforms an ordinary flood light for home into a dependable fixture that performs year after year.
Smart Controls and Automation Features for Convenience
Fine-Tuning Motion Detection Sensitivity and Trigger-Zone Selection
There is a quiet satisfaction in the moment a pathway light awakens precisely as you turn the corner. Modern automation delivers this without you lifting a finger. Motion detection sensitivity is the critical setting that separates a reactive system from a chaotic one. A sensitivity level set too high will trigger a response from passing cars or swaying branches. This often leads to frustration and eventually disabling the system entirely. Fine-tuning this parameter ensures your flood lights for home respond only to genuine presence, preserving both your peace of mind and your energy bill.
Beyond simple sensitivity, trigger-zone selection provides granular control over which areas are monitored. You can program the sensor to ignore the public sidewalk while actively guarding the driveway approach. This strategy is particularly useful in neighbourhoods with high pedestrian traffic. The precise calibration prevents the common nuisance of lights flickering on for every pedestrian who passes by. Instead, the illumination is reserved for movement that actually matters to your property.
The convenience extends into the daily rhythm of your household, offering a layer of intelligence that feels seamless. Consider the features that modern systems typically offer:
– Scheduling lights to match your family’s routines
– Adjusting brightness based on ambient moonlight
– Receiving mobile alerts when zones are breached
– Creating different settings for weekdays versus weekends
The application of these controls turns a simple fixture into a proactive security feature. You are no longer relying on a manual switch, but rather a system that learns the cadence of your life. The technology also allows for a gradual fade-out rather than an abrupt blackout, which is easier on the eyes and less disruptive to neighbours. This level of refinement means the lighting works in silent concert with your daily activities. It anticipates needs without demanding constant attention or manual intervention.
Scheduling with Dusk-to-Dawn Sensors and Countdown Timers
There is a distinct comfort in a home that anticipates the day’s end on its own. In South Africa, where sunset times shift dramatically between seasons, dusk-to-dawn sensors on flood lights for home take the guesswork out of evening security. The fixture detects fading ambient light and activates without a single flick of a switch.
Countdown timers offer a different kind of discipline. A light near the back door can run for twenty minutes after you trigger it, then power down automatically. This prevents the common habit of leaving illumination burning until morning.
– Align lighting schedules with school runs or shift work
– Set timers for braai areas to avoid overnight waste
– Rely on photocell technology to track seasonal changes
These controls reduce the need for constant attention. Once programmed, the system simply follows the rhythm you have set.
Integrating with Mobile Apps, Voice Assistants, and Security Cameras
Smart controls turn flood lights for home into something almost sentient. From your phone, you can adjust brightness, switch zones on or off, or check whether a porch light actually switched on after load shedding. Voice assistants add a hands-free layer. A simple command to Google Home or Alexa can trigger the garden lights as you walk in with groceries.
Security cameras now cooperate with lighting in a single ecosystem. When a camera detects movement, the flood lights for home respond instantly, illuminating the exact area under observation. No separate hub, no complicated wiring. Just a quiet conversation between devices.
– Arm the system remotely from your office
– Sync lighting with camera notifications
– Create automations based on sunrise and sunset
These features make the system feel less like hardware and more like a reliable presence.
Adjusting Ramp-Up and Automatic Shutoff Delays for Comfort
Ramp-up is the quiet feature you notice after a few weeks. When motion triggers flood lights for home, they don’t need to blast to full brightness instantly. A gradual fade over two or three seconds lets your eyes adjust, especially after load shedding has left the yard completely dark. The transition feels deliberate rather than jarring.
Shutoff delays offer the same kind of control on the other end. Set the light to stay on for thirty seconds after movement stops, or stretch it to five minutes for longer evenings outside. The right delay depends on how you use the space:
– A sixty second delay works near a front door where you just need to unlock and step inside
– A five minute delay suits a braai area where people move around constantly
– A ten second delay fits a passage you only cross briefly
This is what flood lights for home can offer once automation is configured properly. You set the pace, and the light follows.
Routine Upkeep and Safety Measures for Outdoor Lighting
Regular Cleaning Techniques for Lenses and Housing Casings
Dust and grit accumulate on outdoor lighting faster than most homeowners expect, and that filmy layer quietly dims the beam’s output over time. For flood lights for home, a simple monthly wipe keeps performance steady and reduces strain on the internal components. Warm water with a few drops of mild dish soap works well, followed by a dry microfiber cloth to prevent streaks.
Lenses deserve gentle handling, but casings require a different kind of attention. Check for hairline cracks, loosened gaskets, and signs of moisture intrusion after heavy rain. Clear away leaves and spider webs from vents, since blocked airflow turns a sturdy fitting into an overheated one.
– Switch off the circuit before any cleaning session
– Let the housing cool completely if the light was recently on
– Use a soft brush for debris in corners and crevices
These small rituals take only minutes, yet they keep every fixture reliable through the dusty Highveld winters and humid coastal summers.
Inspecting Seals, Wiring, and Corrosion-Resistant Hardware
Routine upkeep for flood lights for home goes beyond lens wiping, since the quiet failures often live behind the casing. The rubber gasket that seals the housing is the first line of defence against Highveld thunderstorms and coastal salt air. If that gasket perishes or sits unevenly, moisture creeps in and attacks the circuitry. A five minute visual check each season can save you from a dead fitting right when load shedding hits.
Wiring connections also deserve scrutiny, especially where cables enter the junction box. Loose terminals cause arcing, which generates heat and eventually trips the breaker. Corrosion on exposed copper is another sign to address early, since it increases resistance and reduces the light output. Look for discolouration or a powdery residue on the metal parts.
Hardware corrosion is the sneaky culprit on older installations. The screws, brackets, and mounting arms all suffer from oxidation over time. Use a rust inhibitor on the fixings during your annual inspection, and replace any part that shows pitting. The goal is simple: keep the fixture mechanically sound so the electrical components inside never have to work under strain.
Replacing Aging Bulbs and Faulty Components Efficiently
Another aspect that commonly escapes notice is the simple act of replacing aging bulbs. Every flood light for home has a service life, even the most robust LED arrays. When you notice a dimmer output or a flicker that persists after cleaning, that is your cue to act. Waiting until total failure invites unnecessary strain on the ballast and driver circuitry.
Efficient replacement starts with knowing your fixture’s specifications. Check the wattage and connector type before you climb the ladder. Keep a spare bulb or two in storage, because load shedding schedules rarely align with your maintenance plans. A quick swap takes minutes, but a mismatched component could cause a short that damages the whole housing.
– Turn off the power at the breaker before touching anything
– Use a cotton glove or cloth to handle the new bulb, since oils from skin shorten its lifespan
– Confirm the new bulb seats firmly into the socket, then restore power and test
Faulty components like the photocell or motion sensor deserve equal attention. If your flood lights for home stay on during daylight or refuse to trigger at dusk, the sensor itself is often the problem. These parts are inexpensive and simple to replace, so you can restore reliable performance without calling an electrician. Efficient upkeep here means catching the small failures before they turn into a complete unit replacement.
Alleviating Potential Upgrades, Upgrades, Overheating, and Tariffs
Routine upkeep for outdoor lighting often feels like a chore, but it is the quiet guardian of your investment. In South Africa, where weather shifts from scorching sun to pounding rain in a single day, the housing of your flood lights for home takes a constant beating. Silicone seals dry out, and small cracks form without a sound. A ten minute inspection every season, checking for brittle wiring or loose brackets, prevents a cascade of failures later. Treat it as a small ritual, a way to keep the light honest.
Overheating remains a silent killer of efficiency. A fixture crammed against eaves or choked by overgrown foliage cannot breathe, and heat accelerates the degradation of internal components. When you trim back branches or clear nesting debris, you are not just tidying; you are prolonging the life of every diode. Load shedding adds another layer of stress. The frequent power surges during outages can strain drivers, so investing in surge protection is a wise decision for any homeowner.
Strategic upgrades do not always mean replacing the entire unit. Sometimes, a simple retrofit kit or a newer sensor module can modernize an old fixture without the cost of full installation. This approach also softens the blow of rising tariffs, as more efficient components draw less power during those expensive peak hours. Here are a few checks to include in your seasonal routine:
– Examine the gaskets and seals for any signs of cracking or wear.
– Verify that the fixture is mounted firmly and not swaying in the wind.
– Clear away any spider webs or insect nests from the sensor lens.
– Listen for a buzzing sound, which often indicates a struggling transformer.
By addressing these small details, you ensure that your flood lights for home remain a reliable source of safety and visibility, regardless of the economic or environmental climate.