
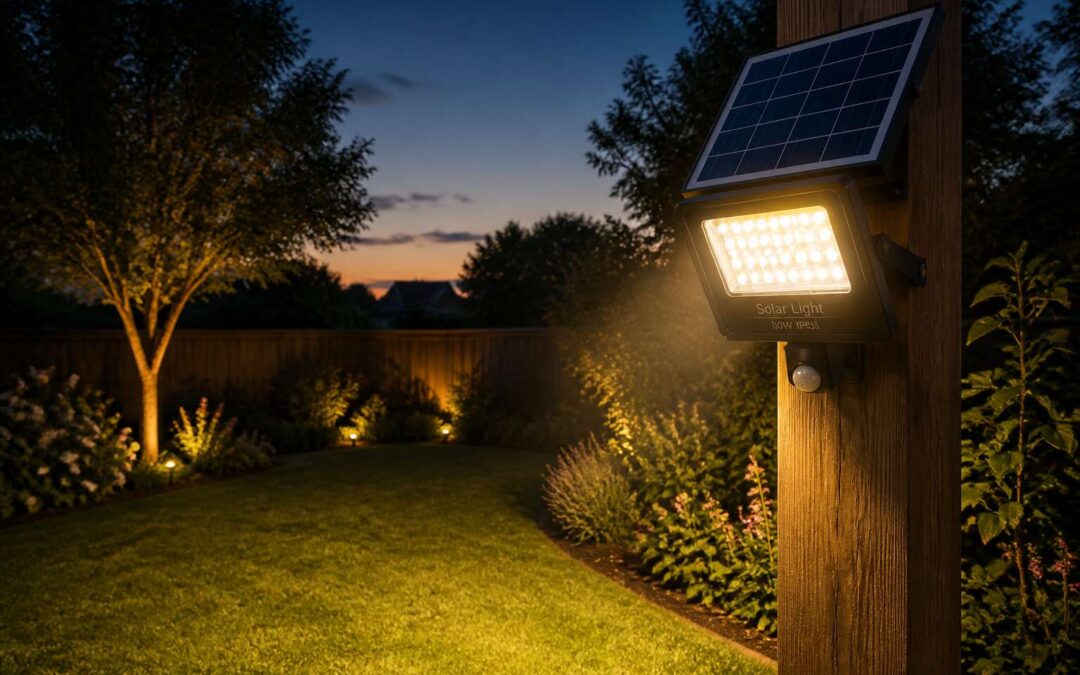
Understanding Sun-Powered Security Lighting Fundamentals
How Photovoltaic Cells Convert Daylight Into Electrical Charge
When loadshedding strikes, your house becomes a monument to inconvenience. Solar flood lights offer a sanity preserving alternative, but the actual magic happens long before sunset. It occurs inside photovoltaic cells, those unassuming panels basking in the sun like lazy iguanas. The process is elegant physics, not sorcery.
Each cell contains a silicon atom with a shy talent. Sunlight knocks its electrons loose, creating a flow of direct current. The system is a family reunion of particles that all start moving in the same direction. To make this genuinely useful, you can break the process down into a simple sequence:
- Photons from daylight strike the panel surface
- Loose electrons generate a direct electrical current
- Wiring sends that current to a rechargeable battery
- The battery stores the charge for evening use
That stored energy is ready for action when darkness falls. The current flows to a high efficiency bulb inside your solar flood lights, converting daylight into reliable security. For a home in Johannesburg, this means the inverter stays quiet and your yard stays visible. The photovoltaic effect handles the heavy lifting, no coal required. Just sunlight, physics, and a battery holding its breath until the grid fails.
The Difference Between Integrated and Split-Unit System Designs
South Africa’s winter sun still delivers enough irradiance to power a reliable security system. Understanding the fundamentals of solar flood lights starts with how the components work together. Solar flood lights consist of three core elements: the panel, the battery, and the luminaire. Each affects performance in a distinct way.
The design choice matters. Integrated units house the panel, battery, and LED in a single fixture. They offer a clean silhouette, which suits smaller properties or rental homes. Split-unit systems separate the panel from the light head. That allows you to mount the panel on a sunlit roof while aiming the light at a dark alley. For a Johannesburg property with a north facing wall and a shaded yard, the split approach delivers better charging.
Here is a simple way to compare those two options:
- Integrated units require less installation work and fewer cables.
- Split units make it easier to reposition the light without losing solar exposure.
- Integrated units often cost less but limit panel tilt adjustments.
Choosing between them depends on your existing mounting points and how much direct sunlight your perimeter receives.
Common Misconceptions About Performance in Overcast Conditions
Rainy Joburg mornings make people doubt their solar flood lights. A common assumption is that cloud cover means zero charging, but that is false. Even thick grey skies deliver diffuse irradiance, enough to top up the battery and keep your security lighting functional. The real culprit is shadow, not overcast. A tree limb or a dirty panel will ruin performance faster than any storm.
Here is what actually matters:
- Panel placement, not sunshine intensity
- Battery capacity for long cloudy stretches
- Regular cleaning of the glass surface
Most homeowners overestimate the sun’s raw power and underestimate their own obstructions. Overcast conditions in Cape Town or Durban reduce output by maybe thirty percent, but they do not stop the system. Solar flood lights are not fragile. They are simply dependent on direct line of sight to the sky, not perpetual clear skies.
Critical Features to Review Before Purchasing Outdoor Solar Luminaires
Brightness and Beam Spread: Interpreting Lumens and Lux
Lumens are the most quoted number in solar lighting, yet they tell only part of the story. Lumens measure total light output, while lux measures how much light lands on a surface. A 2,000 lumen floodlight spread across a wide yard can deliver lower lux than a 1,200 lumen unit aimed at a gate. That distinction changes how you choose solar flood lights.
Beam angle determines where the light goes. Wide beams suit boundary perimeters and open parking areas. Narrow beams work better for doorways, braai zones, or highlighting a wall. When reviewing solar flood lights, match the beam spread to mounting height. A fixture three metres high with a 120 degree spread loses intensity quickly at ground level.
Review these specifications before purchase:
- Lux readings at the actual operating distance, not one metre.
- Beam angle relative to mounting height and coverage area.
- Lumen output matched to the task.
Battery Tech Breakdown: Lithium-Ion vs. Nickel-Metal Hydride
Most solar flood lights fail at the battery first, not the panel or bulb. That makes the chemistry a serious decision. Lithium-ion offers higher energy density and charges faster, which suits smaller fixtures. Nickel-metal hydride, by contrast, handles high ambient temperatures with less degradation. In South African heat, that matters a lot.
Before you buy, check the depth of discharge rating. No battery likes being drained completely, but some tolerate it better. Also compare cycle life at realistic temperatures, not laboratory figures. A 1,500 milliamp hour battery in a cheap unit will not outlast a 1,200 milliamp hour unit with a smarter charge controller.
- Capacity measured in watt hours, not just amp hours
- Operating temperature range for your region
- Number of charge cycles to 80 percent capacity
These details separate a light that runs past midnight from one that fades by sunset. Buy spare batteries if the model allows replacement.
Ingress Protection Ratings and Durability for Extreme Weather
Most outdoor fixtures die from weather before they die from age. A single Highveld hailstorm or week of Cape Town sea spray can kill a poorly sealed unit. The Ingress Protection rating tells you how much punishment a housing can absorb. Look for IP65 or higher. That means the unit is dust-tight and can survive low pressure water jets from any direction. Anything less invites trouble.
South African conditions demand more than a simple water resistance rating. The temperature swing between a Free State summer afternoon and a Highveld winter night puts stress on seals and gaskets. UV radiation from our intense sun degrades plastic housings over time. Check that the lens material is tempered glass or polycarbonate, not acrylic. Check the mounting bracket too. A rusted bracket will drop your expensive solar flood lights into the garden long before the LEDs fade.
– Inspect gasket material for UV resistance
– Confirm the housing is aluminium or marine grade plastic
– Verify the mounting hardware is stainless steel
Thermal cycling is the hidden killer. The expansion and contraction of materials can create microscopic gaps that let moisture creep inside. Look for units with internal desiccant packs or sealed electronics compartments. This is where budget brands fail quickly.
Adjustable Panel Angles to Capture Maximum Sun Exposure
The sun’s arc across the South African sky shifts dramatically between summer and winter. A panel fixed at the wrong angle will starve your batteries during the months you need light the most. The difference between a well-placed unit and a poorly oriented one can be several hours of illumination each night. This is why adjustable panel angles are a critical feature for solar flood lights.
Flexibility here is not a luxury. Fixed panels compromise performance for half the year. When winter arrives, the low northern sun demands a steeper tilt to capture maximum sun exposure. Most quality units allow you to adjust the panel independently from the light head. This lets you point the panel true north while aiming the lamp directly where you need it.
– Verify the hinge mechanism is robust, not a flimsy plastic clip
– Check the cable length between the panel and light for routing options
– Confirm the adjustment range provides at least 45 degrees of movement
Mounting location matters as much as the angle. A bracket that cannot account for a sloped roof or an east facing wall will frustrate you. The best solar flood lights accommodate the realities of your property, not the other way around. Without this adjustability, you are gambling with the performance of your investment.
Smart Controls: Dusk-to-Dawn Sensors, PIR Motion Detectors, and Mobile Apps
Your solar flood lights can be the most powerful on the market, yet still waste energy if they operate on a primitive schedule. Smart controls are the difference between a luminaire that performs and one that merely exists. The intelligence lies in how the unit decides to switch on. A basic dusk-to-dawn sensor is adequate for security, but a passive infrared (PIR) motion detector changes the game entirely. The latter only activates the full output when it detects a heat signature, preserving the battery reserve for those critical moments of unexpected movement.
Mobile app integration adds a layer of remote oversight that is hard to ignore, especially for larger properties. You can adjust timers or check battery status without climbing a ladder. When evaluating the control system, consider how it handles zoning and sensitivity.
– Verify the PIR detection range matches your entrance pathway or driveway length
– Check for adjustable lux thresholds so the light does not flicker on during twilight
– Confirm the app offers a manual override for instances when you need constant illumination
A sensor that triggers on every passing cat will drain your reserves and annoy the neighbours. Conversely, a detector that is too narrow misses the very intruders it is meant to deter. The best systems allow you to fine-tune the sensitivity and the duration of the high output mode. They learn the difference between a swaying branch and a human approach. Without these smart controls, you are relying on guesswork. With them, you reclaim efficiency and security in one decisive move.
Durable Construction Materials for Long-Term Outdoor Installation
Solar flood lights in South Africa face a brutal daily reality. The same ultraviolet radiation that feeds the photovoltaic cells attacks the housing, the lens, and the seals. Coastal properties add salt-laden air, while inland regions bring hail and intense heat.
Die-cast aluminium housings handle thermal expansion better than polymer alternatives. Powder-coated finishes resist chalking when applied over an anti-corrosion primer. In our experience, stainless steel fixings outlast galvanised brackets in marine environments.
- Inspect hinge and swivel joints for weak metals
- Verify the lens material; tempered glass outperforms polycarbonate under strong UV
- Confirm the warranty covers corrosion and UV degradation
Gasket integrity matters as much as the housing itself in solar flood lights. A degraded seal admits moisture, which then corrodes the electronics from within.
Strategic Placement and Setup for Optimal Performance
Angling the Fixture to Eliminate Glare and Dark Spots
Most people assume brightness is the only factor in outdoor lighting, but placement is equally decisive. A single misaligned fixture can cast shadows across half your yard, defeating the purpose of security and visibility.
When mounting solar flood lights, angle the head downward at roughly 30 degrees. This reduces glare for passersby and prevents light from spilling into windows. At the same time, it prevents dark spots near your walls. The trick is to test the beam during evening hours. Walk the perimeter and note where the cutoff lands.
- For pathways, angle lower to spread light along the ground.
- For entryways, tilt slightly upward to wash the door face.
Keep the fixture away from reflective surfaces such as light-coloured siding. That reflection creates a blinding halo while leaving corners in darkness. A thoughtful angle transforms solar flood lights into a precise tool.
Wireless Installation Steps for DIY Enthusiasts and Avoiding Shaded Areas
South African properties contend with intense sun and unpredictable load shedding. Strategic placement of solar flood lights begins with mapping the sun’s path across your yard. A fixture hidden behind a water tank or a dense acacia will never charge correctly. Avoid shaded areas entirely, because partial shade from a boundary wall can cut battery absorption in half.
Wireless installation steps for DIY enthusiasts follow a simple, logical sequence.
- Mount the bracket to a solid wall or pole.
- Attach the light head and tighten the locking bolts.
- Point the sensor toward the area you want monitored.
No trenching, no connection to the mains, and no electrician are needed. Once mounted, the internal charge controller takes over.
Routine Upkeep and Troubleshooting for Extended Longevity
Cleaning Panels and Lenses to Maintain Peak Efficiency
South African sunshine does two jobs at once. It powers your solar flood lights and bakes dust and bird droppings onto the panel until output drops dramatically. I have seen units caked in Karoo dust. Give the optics a wipe with warm soapy water every few weeks, especially after the dry season. In the Highveld, that means a monthly ritual. Skip the pressure washer, unless you want a sprinkler system in place of a security light.
For troubleshooting, don’t assume the worst first. Check connections, inspect the lenses for micro-cracks, and confirm the battery hasn’t retired early. A flickering unit often means a corroded terminal, not a ghost. These solar flood lights are simpler than they look; routine attention solves most issues before an afternoon of crawling around under the eave.
Testing and Replacing Worn-Out Rechargeable Batteries
A battery that dies at 2 a.m. rarely announces itself politely. With solar flood lights, the first sign of trouble often appears as a flicker during load shedding. Before blaming the panel, inspect the terminals for corrosion. A little grease and a snug connection solve most issues.
Testing the rechargeable battery is next. A multimeter reveals the truth instantly. If voltage reads below the rated minimum, the cell has retired. A matching specification is the only sensible replacement, never a cheaper generic. I have seen too many shortcuts fail by July.
These warning signs often appear before a complete failure:
- Sustained dimming after full sun
- Shortened runtimes in clear weather
- Swelling or leakage around the housing
Swapping a tired battery takes ten minutes and extends the unit’s life, which I consider a bargain!
Diagnosing Flickering LEDs and Unresponsive Motion Sensors
Load shedding reveals the true character of solar flood lights. Flickering LEDs often point to a loose earth wire or a corroded connector, not the chip itself. I have traced many intermittent failures back to a single screw terminal left half-tightened after installation. Check those connections first, then examine the wiring harness for sun-cracked insulation. Unresponsive motion sensors usually mean the PIR lens has lost its field of view. A dusty lens fools the sensor into perpetual twilight mode.
– Clean the lens with a microfibre cloth monthly.
– Confirm the sensor sensitivity dial isn’t set to minimum.
– Move the fixture away from heat sources that trigger false alarms.
For solar flood lights with twin heads, one side may stop responding while the other works. That asymmetry often indicates a failed capacitor inside the driver board. The sensor itself rarely dies; it simply needs a reset. Power the unit down fully, wait thirty seconds, then restore power. This clears the internal logic glitch that causes delayed or absent activation. Regular tightening of mounting brackets also prevents micro-vibrations that scramble motion detection. A stable fixture gives you predictable performance, every night.
Seasonal Maintenance Tips for Harsh Winter Climates
Many homeowners underestimate how winter alters the performance of solar flood lights. In South Africa, the freezing nights in the highveld can reduce battery efficiency by up to 30 percent if you neglect basic preparation. The lithium cells inside your fixture do not charge well when cold, so proactive care before the first frost determines whether your security lighting survives the season.
A solid pre-winter check involves inspecting the seals around the LED housing. Moisture ingress is the primary killer of electronics during snow and rain, and a cracked gasket invites condensation that corrodes circuit boards. Wipe down the panel surface to remove the thin film of grime that accumulates during autumn, as this residue blocks the ultraviolet spectrum your unit needs for a full charge.
– Tighten all mounting bolts to prevent wind vibration from loosening the fixture.
– Trim overhanging branches that might drop debris or melt water onto the housing.
– Check the battery compartment for any sign of swelling or discolouration.
For coastal regions with salty air, consider applying a silicone spray to the connector ports. That simple barrier stops oxidation from creeping into the wiring. If you experience a week of overcast conditions, angle the panel steeper to catch the lower winter sun. Adjusting the tilt by fifteen degrees often makes the difference between a dim night and a fully lit perimeter.
Evaluating the Economic and Environmental Benefits
Return on Investment: Comparing Energy Savings Against Wired Alternatives
Replacing a wired floodlight system with solar flood lights changes the arithmetic of outdoor lighting. In South Africa, where electricity tariffs have climbed steadily, the payback period often falls under three years. That calculation ignores the cost of trenching and cabling for a wired alternative, which can exceed the fixture price itself. The environmental ledger looks different too. Solar flood lights avoid the grid losses and coal dependence that characterise conventional power. Over a decade, one fixture can spare several tonnes of carbon emissions.
Consider the cost breakdown:
- Wired installation requires an electrician and cable runs.
- Solar units need only a mounting bracket and sunlight.
The return on investment compounds as municipal rates rise, making the energy savings more valuable each year.
Eligibility for Tax Incentives and Utility Rebates on Renewable Lighting
In South Africa, the economic argument for solar flood lights extends beyond the electricity bill. The national government offers tax deductions under Section 12B for renewable energy investments, letting businesses write off the full cost in the first year. Some municipalities, like Cape Town, provide cash rebates for installing approved solar systems. These incentives shrink the upfront burden dramatically!
Eligibility varies, but generally follows a pattern:
- Equipment must be on the South African Bureau of Standards approved list.
- Installation must be performed by a registered professional where required.
- Utility rebates often demand a specific wattage or efficiency rating.
That means the true cost of ownership depends less on the advertised price and more on local policy. In my experience, the environmental benefit aligns with these financial triggers, transforming each fixture into a clear savings and stewardship opportunity.
Reducing Your Carbon Footprint With Daylight-Charged Appliances
A single conventional floodlight burning eight hours nightly releases roughly 500 kg of carbon dioxide each year. Solar flood lights convert that same illumination into a near-zero emission task.
The environmental benefit compounds. A 100W solar fixture displaces over 290 kWh from the grid annually, cutting the average household carbon footprint by several percentage points. The economic benefit follows the same pattern. No monthly running costs. No cable theft exposure at the boundary wall. Every kilowatt saved is a kilowatt that never enters the national emission tally.
Consider what multiple units achieve:
- Five fixtures reduce grid demand by 1,450 kWh yearly.
- A smallholding becomes more resilient against load-shedding.
- Each installation contributes to South Africa’s renewable energy targets.
Daylight-charged appliances and solar flood lights combine to reduce both operating costs and household emissions. The savings begin on the first night of use.
How Lifespan Expectations Affect Long-Term Cost-Efficiency
Lifespan expectations change the arithmetic of outdoor lighting entirely. A cheap fixture lasting two years forces a replacement cycle that erases any upfront savings. A quality solar flood light, properly maintained, often delivers a decade of service in South African conditions.
The economic picture shifts when you calculate cost per year of use:
- Five years of service reduces annualised cost by nearly half
- Ten years turns the fixture into a reliable infrastructure asset
- Replacement labour and disposal costs vanish from the ledger
The environmental benefit follows the same curve. Longer lifespans mean fewer units in landfills and less manufacturing energy spread across each fixture’s life. For households facing rising electricity tariffs, solar flood lights become a durable answer rather than a temporary stopgap.
Assessing Upfront Costs vs. Minimal Ongoing Maintenance Expenses
Solar flood lights cost more at the register than their wired counterparts, a fact that gives many South African buyers pause. Yet the ongoing maintenance expenses hover near zero. To my eye, that contrast deserves scrutiny.
Consider the full economic picture:
- Initial purchase: one payment, settled on day one
- Operational cost: effectively fixed at zero after installation
- Maintenance: periodic lens wiping and battery replacement after several years
Wired security lights demand continuous electricity consumption and professional installation. These fixtures sidestep both. The environmental ledger follows the same pattern as the financial one. A unit powered by daylight draws nothing from a coal-heavy national grid, and that benefit repeats every evening without an extra cent spent. For South Africans navigating load shedding, this arithmetic matters.