
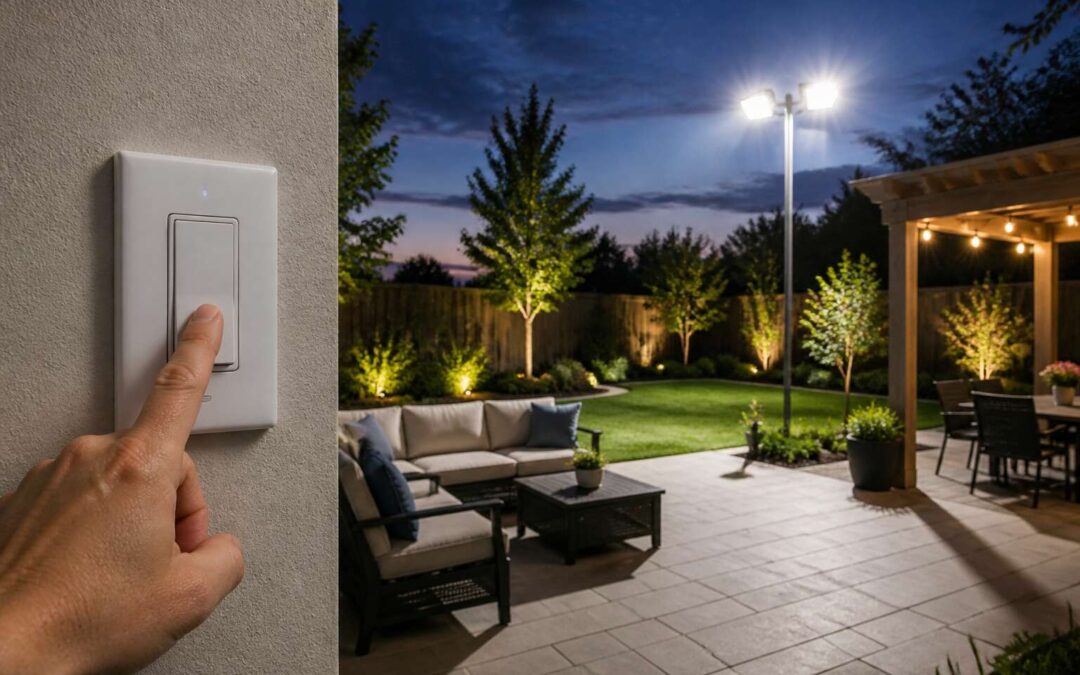
Why Dedicated Switching Matters for Outdoor Illumination
Enhancing Security Through Predictable Light Activation
Most residential break-ins in South Africa occur between dusk and midnight. Light is the primary deterrent, but only when it behaves predictably. A flood lights switch controlled by a separate circuit removes the guesswork from your security routine.
General switches force you to remember, to decide, to act. Dedicated switching automates that burden. It turns illumination into a fixed variable rather than a fleeting intention. The perimeter responds the same way every night, which is what deterrence requires.
- Consistent timing discourages intruders who observe routines.
- Dedicated circuits integrate with timers or sensors without disrupting indoor lighting.
- Predictable activation prevents energy waste while maintaining constant presence.
I have seen too many properties where the only outdoor lighting shares a circuit with bedroom plugs. That arrangement creates a single point of failure. When a flood lights switch controlled by a dedicated relay stops working, you notice immediately. That awareness separates a security feature from a decorative fixture. In a country where load shedding complicates every electrical plan, a dedicated switching point provides one reliable control location!
Reducing Energy Waste With Efficient On/Off Control
Electricity tariffs in South Africa have climbed faster than most household budgets. A flood light that stays on all night is wasted electricity. The difference between a flood lights switch controlled by a dedicated circuit and one sharing a bedroom plug is the difference between paying for illumination and paying for negligence.
A dedicated switch gives you precise on/off authority. You decide when the perimeter lights draw power. That control matters because outdoor lights consume more energy than most homeowners assume.
- Halogen flood lights draw high wattage during operation.
- LED replacements reduce draw but only when switched off properly.
- Manual switching without a dedicated point encourages leaving lights on.
Efficient control is not about remembering to switch off. It is about designing the circuit so the off state is as easy as the on state. A flood lights switch controlled in this manner turns energy saving into a default condition, not a daily chore!
Extending Bulb Life Through Reduced Duty Cycles
Outdoor lighting components are the most abused fixtures in a household. They sit exposed to weather, insects, and voltage fluctuations. A flood lights switch controlled by a dedicated isolator gives these components a cleaner operational profile. This matters for one simple reason: the duty cycle.
Each start imposes an electrical and thermal load on the lamp and its driver. Reducing the number of cycles extends the operational life of the unit. Consider what a dedicated switch prevents:
- Unnecessary ignition surges that stress the capacitor.
- Extended burning periods that degrade the phosphor coating.
- Residual heat that cracks gaskets and housing seals.
Over years, the difference is a working light versus a constant maintenance cost. In my experience, a flood lights switch controlled at the wall ensures the lamp only works when required, and that alone decides how long the bulb lasts.
Simplifying Everyday Operation for Homeowners
The average South African homeowner spends 43 minutes a year hunting for a switch behind the curtain. A flood lights switch controlled from the living room ends that hunt. No more standing in the rain to press a button. No more torch in one hand while your neighbour guesses which switch does what.
Dedicated switching matters because outdoor lights sit in awkward spots. High on a wall, around a corner, behind the braai. A wall switch puts control where people actually live.
A dedicated switch offers:
- One logical point of control for the property.
- Operation without ladders or reaching tools.
- A clear on and off state, no guessing.
For a homeowner in Johannesburg, a flood lights switch controlled from inside is the difference between a working light and a permanent project.
Manual Solutions: Standard Wall Switches and Pull Chains
Interior Wall Switches vs. Weatherproof Exterior Boxes
Somewhere in South Africa, a homeowner is wrestling with a pull chain that snaps back like a rubber band. Manual controls remain stubbornly popular. A standard wall switch inside the house offers convenience, but it fails the moment you need to illuminate a driveway from the outside.
Weatherproof exterior boxes step in. They protect the flood lights switch controlled from rain, humidity, and the occasional wayward hose. Interior switches belong in lounges and passageways, not next to a sprinkler system. One lives in a controlled climate, the other braves the elements.
- Interior boxes suit dry rooms and quick access.
- Exterior boxes demand gaskets, sealed covers, and proper IP ratings.
Pull chains offer no such nuance. They dangle inside garages, waiting for a hand to yank them, while exterior units handle the real work.
Single-Pole vs. Three-Way Switching Circuits
Pull chains might feel honest, but they hide a weakness. They only work where you stand. A wall switch gives you one fixed point of control, which solves little when your yard has two entrances. Single-pole circuits handle the simple job: one switch, one flood lights switch controlled from a single location. Three-way switching solves this properly. It lets you operate the same flood lights switch controlled from opposite ends of the property, such as a gate and a garage door.
Think about your own movement patterns:
- Single-pole for a single entry point
- Three-way for paired locations
- Four-way for three or more control points
Most homeowners stop at single-pole, then regret it during winter evenings. The extra wiring pays for itself in convenience. I have yet to meet someone who installed three-way switching and wanted to go back.
Pull Chain Switches for Post-Mounted Luminaries
Approximately seventy percent of residential light fittings in South Africa are still toggled by a standard wall plate, a figure that speaks to the enduring practicality of manual methods. For a flood lights switch controlled from a porch or passage, the classic toggle or rocker mechanism remains dependable. Its simplicity is its strength: a crisp click, a visible contact, and an immediate result. You do not need a manual or a training session. You will not find the convenience of a smartphone app, but you also will not find a dead battery on a dark evening.
Pull chain switches are the quiet workers of the lighting world. They hang directly from the luminaire, placing the point of control where the light is actually mounted. Post-mounted luminaries, common along long driveways and garden paths, benefit greatly from this arrangement. A chain eliminates the need for conduit running back to the house, which reduces installation cost. Consider the practical differences:
- Wall switches offer fixed, predictable placement for a flood lights switch controlled from a building interior.
- Pull chains offer immediate, tool-free access at the fixture itself.
The choice often comes down to reach. If the post sits ten meters from the back door, a pull chain forces a walk in the rain. But when the luminaries stand near a braai area or seating zone, the chain becomes an extension of your arm. For many properties, a hybrid approach works best: wall switches for the primary entrances, pull chains for the recesses of the garden. Each method has its place, and neither requires complex wiring. You simply choose the one that matches your movement.
Keyed Switches to Prevent Unauthorized Access
In South Africa, a keyed switch offers a quiet form of authority over the night. It changes the dynamic of a flood lights switch controlled from a veranda or passage. The mechanism is disarmingly simple. A physical key, turned in a lock plate, completes the circuit. This single action determines who holds the light and who stands in the dark, a small but meaningful shift in domestic power.
It is a different discipline from a toggle or a chain. It invites a slower, more deliberate interaction. For a household, it means the domestic worker or the visiting relative cannot alter the lighting schedule without explicit permission. This is not about suspicion, but about order.
– It removes the guesswork of who last touched the switch.
– It provides a clear, physical deterrent against casual tampering.
– It secures the fixture against children, who may see a standard switch as a toy.
There is a particular satisfaction in holding the key. It is a tactile reminder that security is not an abstract concept, but a series of deliberate choices. This method suits a property where the perimeter lights are the primary line of defense. It turns a simple utility into a guarded boundary, a small ceremony of control played out at the edge of the property.
Capacitive Touch Switches for Sleek Faceplates
The touch of a cool brass plate or the audible click of a toggle is a form of communication. In many South African homes, the flood lights switch controlled by a standard wall switch offers a direct and uncomplicated relationship with the perimeter. Pull chains remain useful where mounting height makes a wall plate impractical, though they avoid the aesthetic refinement of modern alternatives. Capacitive touch switches change the interaction entirely. A bare finger on a sleek faceplate completes the circuit with no moving parts, no wear, and no mechanical failure.
- Standard wall switches suit most indoor installations
- Pull chains work for pendant or high-mounted fixtures
- Capacitive touch models offer minimalist design and silent operation
Each option shapes the daily ritual differently. The choice depends on surface material, reach, and the texture of control you prefer.
Automated Approaches: Timers, Sensors, and Smart Home Integration
Astronomical Timers That Follow Seasonal Sunset Times
Nothing ruins a suburban evening like the neighbour’s floodlights blazing at noon. We have all seen it, the solar sensor confused by a passing cloud, or the manual switch left on from last night. In South Africa, where daylight shifts dramatically between seasons, a simple timer proves unreliable. An astronomical timer calculates sunset and sunrise for your exact longitude, adjusting itself daily. This means your flood lights switch controlled by such a device operates with quiet precision. No more fumbling in the dark, no more paying to illuminate an empty yard.
Consider what these timers handle gracefully:
- Seasonal variation without manual resetting
- Daylight saving changes, where applicable
- Power outages with battery backup for schedule retention
The result is a system that respects both your security routine and your electricity bill. It is automation with a sense of occasion, marking the close of each day with deliberate light.
Motion Sensors With Adjustable Sensitivity and Duration
Motion sensing transforms a flood lights switch controlled by mere habit into one that responds to actual presence. In South Africa, where an unexpected visitor might be a person or a porcupine, adjustable sensitivity matters. Set the detection range to cover only your driveway, not the pavement beyond the gate. Set the duration to three minutes, enough to cross from car to door, not enough to bathe the garden in light until dawn.
Consider how these settings interact:
Sensitivity thresholds filter out small animals and wind-blown leaves.
Duration timers prevent an endless pool of light.
Test modes let you confirm coverage before settling on final settings.
The result is a motion-aware perimeter that acknowledges activity, then returns to darkness. A flood lights switch controlled this way responds to real events without constant supervision.
Photocell Sensors for Dusk-to-Dawn Operation
Load shedding has a curious side effect. It resets every device that relies on memory, including your outdoor lighting. A photocell sensor skips that problem entirely. It reads ambient light levels and decides on its own, no clock required!
Here is what makes this approach practical:
- The sensor switches the floodlight on when the sky darkens, then off when morning returns.
- It ignores load shedding because it does not depend on a timer or network.
- It works with any standard floodlight, given a clean view of the sky.
That means your flood lights switch controlled system handles dusk to dawn without you touching a thing. Simple and effective.
Wi-Fi Switches and App-Based Remote Scheduling
Load shedding has stolen more than electricity. It steals predictability. A smart switch brings that predictability back to your flood lights switch controlled system. Unlike basic timers, which reset during outages, a Wi Fi smart switch remembers your settings in the cloud. You can adjust schedules from your phone, no matter where you are. App based remote scheduling also follows seasonal sunset shifts. That means your evenings stay lit without constant manual intervention.
What does app control give you?
- Instant remote toggling for unexpected darkness
- Alerts for unexpected activation
- Custom weekly routines
This approach creates a resilient security feature, ready for any grid failure.
Voice Assistant Integration for Hands-Free Commands
Voice command is the fastest way to take control when your hands are full. A flood lights switch controlled system with voice integration lets you speak from the car, the kitchen, or the bedroom. The voice recognition layer responds. No phone, no wall panel, no delay.
This matters in South African homes where load shedding makes darkness unpredictable. Timers hold the routine. Sensors detect movement. Voice overrides both when circumstances change. Your flood lights switch controlled network becomes a layered security system that answers to you.
- Request status updates without stepping outside
- Adjust activation schedules mid conversation
- Group flood lights with indoor lamps for full property coverage
Voice integration adds redundancy during grid failures. When municipal schedules shift and inverters hum, you keep direct control. Command the system aloud and it obeys in a second! That is the difference between waiting for the grid and commanding your own night.
Scene Setting With Smart Dimmers for Versatile Ambiance
Automated approaches are not limited to binary states. A flood lights switch controlled network with smart dimmers can transition from full security brightness to a soft glow for evening entertaining. This versatility transforms outdoor space.
Scene setting relies on grouping. Instead of treating each fixture separately, you define profiles. The patio zone might drop to 30 percent while the driveway stays at full power. This layered response is the core of smart home integration.
- Welcome mode at 60 percent for arrivals
- Privacy mode at 15 percent near windows
- Full activation only when sensors trigger
The integration layer communicates with your existing dimmers, so a single command adjusts both floodlights and indoor lamps. This is where automated approaches become truly versatile. You trade fixed schedules for responsive ambiance.
Wiring, Placement, and Installation Best Practices
Understanding Line Voltage vs. Low Voltage Systems
The real test of any flood lights switch controlled setup happens during installation. South African homes run on 230V mains, so line voltage fixtures connect directly to the breaker panel. Low voltage systems step power down through a transformer, often to 12V or 24V, for safer operation near pathways and gardens. That distinction influences every wiring decision, including cable gauge and switch compatibility.
Placement deserves equal attention. A fixture mounted too high scatters light across empty space, while one aimed too low creates harsh glare. Follow these basics:
- Mount floods at least 3 metres above ground to cover wide areas.
- Tilt fixtures downward 15 to 30 degrees to reduce blinding.
- Bury low voltage cables at least 150mm deep.
Voltage drop becomes noticeable on long low voltage runs, so measure distances before selecting transformer capacity. A properly installed flood lights switch controlled system simply works, no fuss, no flicker.
Choosing the Correct Wire Gauge and Conduit Type
Choosing the correct wire gauge starts with the distance between your breaker and the flood lights switch controlled circuit. South African homes on 230V mains generally handle 1.5mm² copper for lighting loads. Longer runs push voltage down, so 2.5mm² becomes necessary. Measure the route before buying cable, and stick to that number!
- Measure the full cable run before selecting gauge.
- Select SANS approved conduit for every buried section.
- Test insulation resistance before final connection.
Conduit type matters equally. PVC conduit resists moisture, making it a solid choice for underground runs. Steel conduit protects against impact in exposed areas. The flood lights switch controlled system needs a weatherproof junction box wherever cable exits the ground.
Placement affects wiring access. Keep fixtures near existing cable paths to reduce hidden trenching. Secure all connections inside IP rated boxes. Verify polarity and earth continuity before powering up that flood lights switch controlled setup.
Proper Switch Box Mounting in Outdoor Wall Surfaces
A switch box is a tiny fortress against the elements, but only if its mounting respects the physics of a wall. When you set a weatherproof box flush against outdoor plaster, the seal becomes the first line of defense. A gap here invites moisture that will eventually corrode the terminals behind your flood lights switch controlled plate. The backing must sit true against the surface, which often means using a mounting block or a thicker gasket to bridge uneven brick or timber.
The depth of the box matters as much as the seal. A shallow cavity leaves wires folded too tightly, creating stress on connections that shorten their lifespan. You want enough room for the conductors to breathe and bend naturally.
When screwing the box to the wall, consider the material:
– Use stainless steel screws for masonry to prevent rust streaks.
– Add rawl plugs for brick or concrete surfaces.
– For timber cladding, pre-drill pilot holes to avoid splitting the wood.
– Always apply exterior grade silicone around the top edge only, leaving the bottom unsealed for drainage.
Position the switch at a height that clears common splashing from sprinklers or rain bounce. A typical installation sits at roughly 1.4 meters above ground level. This places the toggle within easy reach while keeping the internal components above the splash zone. The final connection should be snug, with the switch action feeling crisp. If it feels spongy, the wires inside are likely interfering with the mechanism. That sponginess will eventually cause the flood lights switch controlled system to fail at the worst moment, usually during a storm.
Grounding and GFCI Protection Requirements
Wiring an outdoor flood light demands respect for current. The circuit that feeds your flood lights switch controlled system must carry a dedicated earth conductor. Without it, any fault in the weatherproof housing leaves the metal shell live. That is how shocks happen.
- Run the earth wire uninterrupted from the distribution board
- Use a 30 mA residual current device on the circuit
- Fit a weatherproof GFCI outlet for the switch location
Placement also matters. Mount the box clear of sprinklers and standing water. In South Africa, summer storms send water streaming down exterior walls, so set the switch at 1.4 meters. The ground wire must bond securely to the switch’s earth terminal. Test the GFCI monthly with the test button. A flood lights switch controlled properly earthed handles load shedding surges without tripping.
Planning Switch Locations for Convenient Access
Place the switch where the hand already knows the way. South African homes carry their own rhythm. The scullery door, the garage threshold, the passage end. These are the spots where a flood lights switch controlled from a natural position removes the guesswork from entering a dark yard.
Study the sequence of movement from car to door. The switch should sit on the side of the frame nearest the handle, never buried behind a curtain or a climbing plant. For double storey homes, consider a second control point at the top of the stairs.
- Entry points used after nightfall
- Distance from sprinkler spray
- Line of sight to the luminaire
A switch that fights the flow of the household will go unused. And an unused switch is the most certain way to leave the property in darkness.
Hiring a Licensed Electrician vs. DIY Installation
Wiring a flood lights switch controlled from an interior wall is not the place for guesswork. South African homes run 230V through the walls, and a loose connection can cause arcing inside the switch box. The placement of the switch is just as important. Keep it clear of sprinkler lines and at a height that matches the natural reach of the household.
Now the question of who does the work. A licensed electrician will isolate the circuit, confirm the earthing, and issue a compliance certificate. That certificate matters when you sell the house or claim on insurance. DIY installation is cheaper upfront, but the cost of a failed inspection or a fire is far higher.
If you choose to hire someone, check a few things:
- Confirm they are registered with the Department of Employment and Labour.
- Ask for a written quote before any work starts.
- Request the Certificate of Compliance once the job is done.
The right switch in the wrong hands is still a hazard. Hire the person who does this work daily.
Maintenance, Upgrades, and Troubleshooting for Switching Systems
Quick Fixes for Flickering Lights and Dead Switches
Roughly 35% of outdoor lighting malfunctions stem from worn switch internals, not the luminaire itself. This reality hits home when your flood lights switch controlled from a hallway panel starts to flicker. Tightening loose terminal screws often restores steady current. Dead switches usually demand a different approach: check the breaker, then test voltage at the load wire. If power stays absent, replacement is the honest fix.
Upgrading to a sealed relay or smart module limits dust and moisture intrusion. For persistent issues:
- Always kill power at the breaker before opening any box!
- Inspect wire insulation for cracking under South African heat.
- Use dielectric grease on outdoor connections to forestall corrosion.
I have seen corroded contacts fail within two rainy seasons. A proactive swap every decade prevents the breakdown that leaves you in darkness.
Upgrading Legacy Toggle Switches to Modern Smart Controls
Replacing a legacy toggle switch with a smart control changes how you relate to your flood lights switch controlled from inside the home. I always check the neutral wire first; many older South African boxes lack one, and modern modules require it.
Upgrading demands patience. Photograph the connections, label every wire, and verify box depth before buying. Smart switches with built-in relays handle the load directly but need airflow. Cramped housings trap heat and cause early failure.
When troubleshooting, check the firmware first. A glitchy app mimics a hardware fault. Then test the load wire with a multimeter. If voltage reads correct but the light stays dark, the relay may have welded shut.
- Confirm the module’s wattage rating matches your LED driver’s inrush current.
- Test Wi-Fi strength at the switch location; weak signals delay commands.
The best upgrade feels invisible. Tap the phone and the courtyard floods with light! The quiet click you no longer hear is the relay working.
Seasonal Inspections of Seals, Gaskets, and Wiring
Seasonal inspections are tedious, but skipping them invites painful consequences. The seals and gaskets on your flood lights switch controlled from the patio endure Highveld thunderstorms and coastal salt. Cracks let moisture into the switch box, and corrosion follows.
Before summer rains arrive, check the wiring for brittleness and discolouration. Replace any gasket that feels hard or shows compression set. A simple test: close the box and spray water at it. If droplets appear inside, you have found your problem.
- Check that all conduit fittings are snug, not hand tight.
- Wipe dielectric grease on terminals to repel humidity.
- Verify the rubber boots around toggle levers are intact.
For upgrades, choose IP65 rated enclosures rather than decorative covers. For troubleshooting, a multimeter across the load terminals tells you if the switch is passing current. If not, the issue lies upstream.
When to Call a Professional for Persistent Switch Failures
A flood lights switch controlled from the wall that fails every rainy season points to a deeper issue than a worn contact. When new switches keep dying, the enclosure is usually the culprit. The gasket looks fine, but the conduit fitting leaks. If you have replaced the switch twice in eighteen months, stop buying cheap mechanisms.
Upgrading to a corrosion resistant switch and an IP65 box solves most recurring failures. The labour cost is the same as a stopgap fix. Call a professional when the flood lights switch controlled from the patio trips the breaker, when terminals show burn marks, or when the switch body feels warm to the touch.
- Burned smell from the switch box
- Voltage drops when the switch engages
- Tripping that only happens after rain
These signs point to arcing or insulation breakdown. Persistent failures mean the fault is upstream, in the wiring or the fixture itself.