
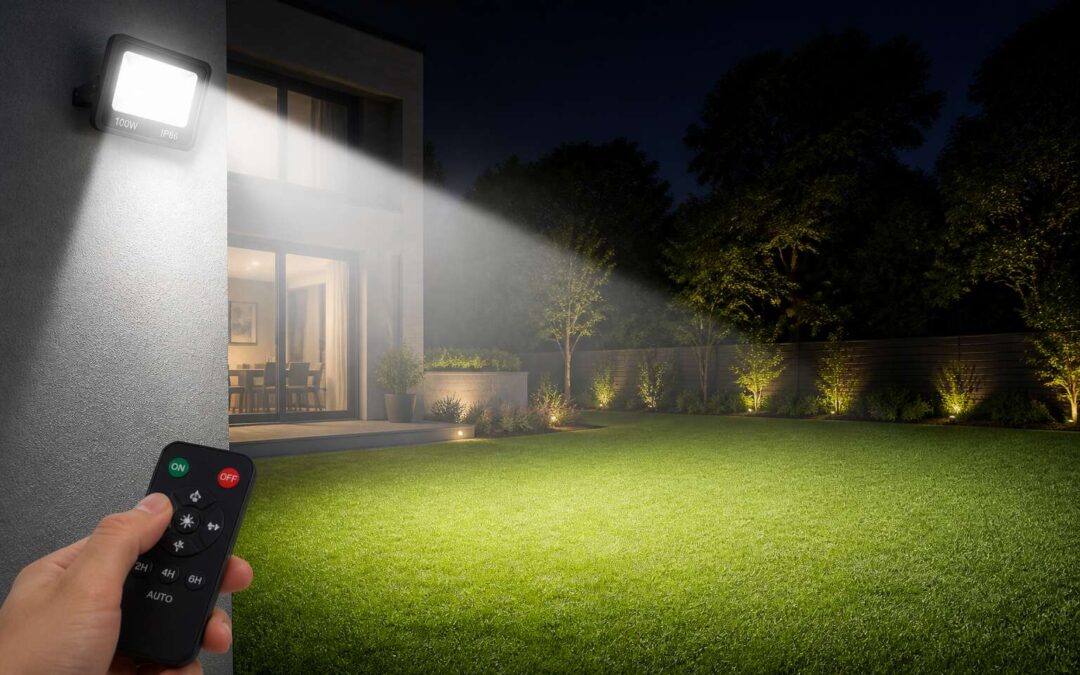
Benefits of Remote-Controlled Outdoor Lighting
Convenience and Ease of Operation
Recent energy audits suggest the average South African homeowner toggles outdoor lights more than ten times per week. That constant reaching for switches becomes unnecessary with remote control technology! Flood lights with remote give you complete command from inside your home, sparing you from evening trips across a damp garden or dark driveway.
Consider what this convenience means for your nightly routine:
- No more fumbling for wall switches in the dark.
- Instant adjustments when guests arrive or depart.
- Simplified scheduling for dusk and dawn activation.
A single press changes the entire atmosphere outside. You save minutes each day and remove the physical strain of walking through cold or rainy weather. The operation feels intuitive, almost second nature, since the controls respond immediately to your command. Ease becomes the defining feature of your property’s exterior.
Enhanced Security and Deterrence
Security experts often point to lighting as the first line of defence against opportunistic crime. In South Africa, where many properties sit behind high walls and electric fencing, the perimeter remains a vulnerable zone. A dark yard invites inspection. A well-lit one signals that someone is paying attention. Flood lights with remote give you the power to flip that signal in an instant.
Flood lights with remote change how you manage that signal. Instead of leaving lights on all night, which costs money and annoys neighbours, you can activate them precisely when something feels off. A suspicious sound near the gate. A late delivery. A vehicle idling outside. You respond instantly from your bedroom or couch, illuminating the area before you even open the door. In my experience, that split second of light is often enough to send someone on their way.
This immediacy is the core of deterrence. Burglars and intruders rely on predictability. They watch a property for patterns, noting when lights stay dark or when movement goes unseen. Remote controlled floodlights break that pattern. Your responses become irregular, and that irregularity is exactly what makes a would-be intruder hesitate. Hesitation costs them time, and time is their enemy.
Consider what this means for high-risk areas around your home, where flood lights with remote offer the most value:
- Driveways and parking areas where vehicles are targeted.
- Backyard entrances and service gates that sit out of sight.
- Side passages between buildings, often the weakest link in home security.
Each of these zones becomes a tactical advantage when you can light it on demand. You also avoid the giveaway of a house that is empty. With remote operation, you can switch lights on and off throughout the evening, creating the appearance of active occupancy. This simple act of variation has a real effect. It removes the static cues that criminals depend on.
Moreover, the presence of flood lights with remote reduces reliance on static timers. Timers follow a schedule that can be learned. Your remote control follows no schedule at all. It responds to the moment, to your instincts, to the specific situation unfolding outside. That unpredictability is a deterrent that no fixed system can offer.
Energy Efficiency and Cost Savings
Here is a number that should make any South African wince: roughly a third of all outdoor lighting electricity goes to lights nobody is even looking at. Flood lights with remote change that equation, because they obey a human finger, not a mindless timer.
You illuminate the yard for the exact minutes you need, then cut the power. No more leaving a 500 watt halogen blazing all night because you plain forgot. The result appears on your next municipal bill.
- Switch on only when you step outside.
- Switch off from your bedroom, no late night walks to the wall switch.
Add LED technology and the savings multiply. Many flood lights with remote consume less than 30 watts while producing the same brightness as older units at five times the power. During load shedding, that efficiency matters even more, because every watt from your inverter or battery is precious.
Flexible Lighting Scenes
Outdoor lighting often follows a single pattern: full power or nothing. Flood lights with remote break that binary. They let you adjust brightness, beam angle, and colour tone to match the moment.
A single fixture can flood the braai area with crisp light for cooking, then soften to a warm glow for late night conversation. Flood lights with remote can handle both tasks without rewiring or adding fittings. You might program:
- Warm light for evening entertaining
- Cool bright light for practical tasks
- Dimmed levels for quiet reading
- Focused beams for architectural features
Some remotes also support gradual transitions, so the yard fades to darkness instead of switching off abruptly. That preserves the mood and reduces wasted energy. In a country where load shedding makes every lumen valuable, flood lights with remote give you precise control over what your outdoor spaces look like at any given hour.
Key Features to Evaluate in Remote-Controlled Floodlights
Wireless Range and Connectivity Options
A remote that dies at the gate defeats its own purpose! South African properties often stretch beyond the front door, so wireless range dictates whether your flood lights with remote respond from the bedroom window or force a midnight trek across wet paving.
Most units broadcast on 2.4 GHz radio frequency, a band that penetrates brick and timber more effectively than Wi-Fi, although corrugated metal roofs and concrete pillars absorb much of that signal. Connectivity options vary.
Some remotes pair with a single receiver; others govern a bank of fixtures from one controller. In my experience, the protocol and frequency band matter as much as the advertised meter range. A dependable unit holds a stable connection through one interior wall and reaches at least 30 meters across an open yard.
Brightness, Color Temperature, and Adjustability
Raw lumens mean little if the beam scatters into the dark without purpose. When evaluating flood lights with remote, consider the colour temperature, for a warm amber can lend a sepulchral cast while cool white slices through the mist with clinical precision. The true measure of a fixture, however, lies in its adjustability. A fixed head forces the light to obey the manufacturer’s will. I prefer a gimbal mount that lets me aim the beam across a shadowed fence line or into a carport’s recessed gloom.
Certain attributes demand scrutiny before you commit a flood light with remote to your wall:
- the colour temperature range, measured in Kelvin, which dictates whether you bathe in spectral moonlight or endure that sickly sodium glow
- the beam angle, for a narrow spotlight carves through distant darkness while a wide flood must saturate the immediate ground
- the mounting pivot range, which determines whether you can sweep the beam into corners, over gates, and along roof eaves without ladders
This articulation transforms a simple glare into a deliberate, controlled defence of the threshold.
Durability and Weather Resistance Ratings
An IP rating is a promise, not a suggestion. When evaluating flood lights with remote, check the ingress protection number carefully. IP65 means the unit is dust-tight and withstands water jets. Along the South African coast, salt-laden air accelerates galvanic corrosion, so for flood lights with remote, scrutinise the housing with equal care. Die-cast aluminium with a powder-coated finish outperforms untreated steel.
Pay attention to these details.
- The rating on the junction box, not just the lamp head.
- Stainless steel mounting hardware.
- The sealing of the remote antenna port.
Tempered glass lenses resist hail, while polycarbonate yellows under intense UV. A sealed unit with proper drainage protects the electronics through every thunderstorm. Durability is not a luxury. It separates a working security tool from an expensive weather ornament.
Power Source and Battery Backup
Nothing tests a security light like a South African winter evening. When the grid drops, a hardwired flood light stays dark. Battery backup changes that equation. Flood lights with remote that switch to stored power within milliseconds outperform models that reboot slowly. Lithium iron phosphate cells outperform lead acid in heat, handling 44 degree summer days without swelling.
Some models combine solar trickle charging with mains power, extending battery life and reducing grid reliance. A unit running on three sources offers genuine redundancy. Battery capacity in watt hours reveals actual runtime better than amp hours. That number shows how long the light holds full brightness through a two hour outage.
Compatibility with Voice Assistants
Voice assistant compatibility is the hidden layer that transforms a fixture into something almost sentient. I have watched homeowners stand in their driveways, arms crossed, speaking to the dark. “Lights on.” The flood lights with remote respond before the echo fades. But compatibility is not uniform.
Here is what separates seamless integration from frustrating lag:
– Native protocol support, be it Zigbee, Z-Wave, or Wi-Fi direct
– Local processing versus cloud dependency
– Skills or routines that allow geofencing triggers
A unit dependent on cloud servers will hesitate when your fibre drops. Ask about offline voice control. Some models process commands locally, which matters during load shedding. The best units recognise multiple profiles, so your voice dims the security beam while your partner’s voice triggers full brightness. That distinction matters at 2am.
Step-by-Step Installation and Setup Guide
Choosing the Right Mounting Location
The best spot for flood lights with remote is the one that gets overlooked until you actually need them. Mount the unit high, around three metres from the ground, and angle the heads to cover your driveway or back gate. A solid rule is to position the sensor so it sees across the area you want lit, not a neighbour’s boundary or the street. Reflective surfaces, like a white wall or a wet driveway, also cause nuisance triggers, so test the aim before fixing everything permanently.
Use this placement checklist while you scouting:
– Choose a spot near an existing power source
– Keep the sensor clear of tree branches and moving foliage
– Check the remote signal works before drilling all holes
Once the location is set, the actual setup is straightforward. Turn off the electricity at the distribution board. Fix the mounting plate with masonry bolts, then connect the live, neutral, and earth wires using terminal blocks. Secure the housing, adjust the lamp heads, and restore power. Pair the remote as per the manual, usually by holding the sync button until the light blinks. Set the timer and sensitivity, then test from different corners of the yard. A few minutes of adjustment saves weeks of irritation.
Wiring and Electrical Safety Considerations
South Africa sees thousands of electrical callouts each year, many from faulty DIY lighting installations. That statistic alone should give you pause. Before any work, switch off the main breaker and verify the circuit with a voltage tester. If the existing wiring shows corrosion or brittle insulation, call a registered electrician. This task demands respect!
- Secure the mounting bracket to a wall stud using stainless steel screws.
- Strip the cable sheath and connect live, neutral, and earth using terminal blocks.
- Seal all entry points with a weatherproof gland to keep dampness out.
- Attach the housing, then restore power briefly to check the connection.
After the power returns, pair the flood lights with remote by holding the sync button until the LED blinks. Adjust the sensitivity dial so passing cars do not trigger it. I always test the flood lights with remote from the back corner before tightening the final screw. Those ten minutes spare you a ladder trip later.
Pairing the Remote and Syncing Devices
The mounting bracket demands a solid anchor. Find a wall stud, not plaster. Stainless steel screws resist coastal corrosion. Fit the housing loosely. Wire the terminals before sealing. The earth wire is non-negotiable. A weatherproof gland keeps dampness out. Tighten the housing and restore power.
The flood lights with remote wait for their moment. Press the sync button and hold it. The LED blinks, then settles into a steady pulse. Now the remote learns the light’s frequency. For multiple units, enter pairing mode on each and press the same handset button. Walk the property line. Press the button. If the light answers at thirty metres, the pairing holds.
- Press the sync button until the LED blinks
- Check that the light responds from every corner of the yard
The sensitivity dial. Turn it slowly to ignore passing cars. Walk the boundary after dark. The flood lights with remote extend your vigilance.
Testing Range and Signal Strength
Every installation begins with a moment of stillness. The fixture hangs heavy in your hands, a dormant sentinel awaiting its spark. Position the housing against the wall, checking the alignment with a level before committing to the drill. Mark your points. Step back. The first hole sets the tone for everything that follows, so measure twice and let the masonry bit do its work.
Once the bracket is anchored, the real craft begins. Connect the wiring with deliberate care, ensuring each terminal is snug and protected from the elements. The screws tighten in sequence, drawing the fixture flush against the mounting surface. Tuck the excess cable behind the unit and secure the gland fittings to keep moisture at bay. The flood lights with remote now hang prepared, their lenses dark and patient.
Testing occurs in stages. Begin indoors, confirming the power supply hums with quiet readiness before flipping the main switch.
- Switch on the circuit and observe the initial power surge
- Wait for the LED arrays to stabilise in their default state
- Stand ten metres away and trigger the handset for the first time
The response should be immediate, a sudden bloom of white cutting through the dusk. Pay attention to the shadows thrown across your property line. If anything flickers or hesitates, revisit the connections before proceeding.
Range presents its own challenge. The yard’s far corners demand attention, and a thirty metre claim on paper often shrinks in practice. Walk the perimeter with the remote held low, then high, testing every angle. Obstructions like brick walls and garden sheds can swallow a signal whole. The flood lights with remote should answer your command from the gate, the driveway, and the darkened side passage alike. Persistence at this stage prevents frustration later, when the night presses in and you need the light most.
Remember that the sensor’s field of view extends beyond mere illumination. Adjust the angle of the heads so they sweep across vulnerable entry points rather than washing light uselessly against the neighbour’s fence. Walk the boundary again after dark. The flood lights with remote become an extension of your awareness, their sudden glow a declaration that you remain watchful, even when the house sleeps.
Adjusting Motion Sensor Settings
Installation rewards patience. Begin by securing the bracket to a solid surface, using a level to confirm the housing sits true. The flood lights with remote require stable anchorage, so use masonry anchors for brick or plaster. Once mounted, adjust the sensor head before finalising the wiring.
Motion sensor settings demand nuance. The detection zone should cover your entry paths, not the street. Twist the sensitivity dial to ignore small animals, and set the timer to a minimum of three minutes. The flood lights with remote then respond only to meaningful movement.
- Rotate the sensor left or right to shape the coverage
- Tilt the head downward to avoid false triggers from passing cars
- Test the range by walking across the yard at night
Each adjustment changes the behaviour of the flood lights with remote, so revisit the settings after install. Fine-tuning now saves frustration later.
Troubleshooting Common Remote and Connectivity Issues
Remote Not Responding? Quick Fixes
Your flood lights with remote can turn stubborn without warning. The cause is rarely the bulb. More often, a power surge scrambles the internal receiver, or a new appliance in your home emits radio frequency noise. Check if other remotes in the house work. If they do, the problem sits inside the light fixture itself.
Try this reset sequence before you call an electrician:
- Switch off the light at the wall and wait 30 seconds.
- Remove the batteries from the remote and hold the power button for five seconds.
- Reinstall the batteries and restore power.
- Press the pairing button on the light, then press any key on the remote.
If the link fails again, inspect the remote’s circuit board for corroded contacts. South African humidity and coastal salt air often cause this. A cotton swab with rubbing alcohol cleans the contacts and restores the connection. Your flood lights with remote will stay quiet no longer.
Interference from Other Wireless Devices
Interference from other wireless devices often looks like a broken fixture. When your flood lights with remote start flashing or ignoring commands, the culprit might be a neighbor’s new router, a baby monitor, or even a garage door opener on the same frequency band. These devices can drown out the 433 MHz signal entirely.
I have seen South African homes where a solar inverter or a security camera hub causes random dropouts. The remote works fine near the receiver, yet fails at distance. That narrowing window is a classic signature of spectral congestion.
Try changing the transmission code on the remote, or shield the receiver’s antenna from direct line of sight to the interference source. Sometimes, moving the receiver a few centimeters off the wall changes everything. The flood lights with remote will respond consistently once you find that quiet spot.
Resetting the Remote and Receiver
Flood lights with remote can lose their pairing without warning. A voltage dip or a flat battery in the handset scrambles the stored code. The receiver hums with power but ignores every command. I have watched homeowners stand ten meters away, jabbing the button, convinced the unit is dead. It is not dead. It has simply forgotten the remote’s signature!
To force a complete reset, follow this sequence:
- Switch off the receiver’s main breaker and wait ninety seconds.
- Press and hold the small reset pin on the housing while restoring power.
- Release the pin after the LED flashes, then press the remote’s test button.
The unit will respond immediately if a proper reset worked. This process wipes volatile memory that holds glitches from brownouts or EMF spikes. It is a reliable cure for stubborn connectivity issues that mimic hardware failure.
Replacing Batteries and Maintaining Signal
On a smallholding outside Nelspruit, I watched a farmer climb a ladder three times in one afternoon, convinced his flood lights with remote had finally died. The fault was simpler. The handset’s battery had drained gradually, and the signal faded with every volt lost.
Replacing the battery is the first step in any serious troubleshooting routine. Use the exact cell type printed inside the compartment. Cheap alternatives deliver uneven current, which mimics serious hardware faults.
Signal maintenance depends on the receiver’s position. Clear away dust, cobwebs, and metal objects that block the radio path. A receiver buried behind a steel beam will always feel unreliable.
Check these details when the system seems sluggish:
– The remote’s contacts are clean and free of corrosion
– The receiver’s antenna points upward, away from metal cladding
– The battery sits snug, with no rattling in the case
A two rand battery swap solves more connectivity complaints than any replacement unit.
When to Seek Professional Help
For flood lights with remote, forty percent of service calls end with the same verdict: the remote was never the problem. On a cattle farm near Ermelo, I once traced a recurring dropout to a loose neutral in the distribution box, not the receiver. Intermittent connectivity usually points to voltage sags from heavy machinery. Test the supply with a multimeter before touching anything else.
When should you stop troubleshooting and call a professional? These warning signs demand a certified electrician:
- Visible scorch marks or melted plastic near the receiver
- A persistent burning smell that follows the unit’s operation
- Water condensation inside the housing despite sealed gaskets
I have seen DIY attempts on such symptoms cause more damage than the original fault, especially with flood lights with remote. A proper diagnosis takes an hour and costs less than a replacement receiver board. The technician’s experience with voltage spikes and relay failures prevents repeat outages.
Integrating Remote-Controlled Floodlights into Your Smart Home
Using Smartphone Apps for Centralized Control
South African homes now rely on connected technology for security, climate, and entertainment, yet outdoor lighting often remains on old wall switches. Integrating flood lights with remote into a smart home system moves past simple on and off commands. The app becomes the control center, gathering multiple fixtures under one interface.
Centralization is the core benefit. You no longer search for a dedicated remote or walk to a wall switch. The application groups lights by zone, so the backyard, driveway, and patio respond to a single tap, even when you are away. Scheduling aligns with daily routines, syncing with alarms or security systems without additional hardware.
Setup demands a stable Wi-Fi connection and compatible fixtures. Most flood lights with remote support standard protocols, so they integrate into existing ecosystems without friction. Once linked, the app displays status updates, battery levels, and toggles for instant adjustments anywhere.
Automation Scenes with Timers and Schedules
Arriving home to a lit driveway feels different when no one had to remember. I noticed how a timer removes the mental load entirely. The flood lights with remote obey a pattern you set once, fading in before dusk and stepping down after midnight. That predictability lowers the small anxieties of arriving late.
Scenes deepen this. The 18:00 schedule triggers the gate light, the patio flood, and the hallway lamp together. No switch, no negotiation with a remote. Your evening simply begins.
What matters is trust. The schedule holds its promise without reminding you. Your environment keeps time, and you get to stop carrying all of it.
Geofencing and Voice Control Integration
Geofencing turns your approach into a signal. Your phone crosses the boundary and the flood lights with remote wake before your key touches the lock. This is not a timer because it reads presence, not the clock.
The system learns patterns in the background. You define the zone, and the receiver handles the intelligence. No scene to summon, no switch to stroke. That is the difference between operating a device and inhabiting a system. The lights simply know.
- No arrival sequence to recall
- No late night fumbling
- No dependency on a schedule that cannot see you
The quiet strength of geofencing is that it never asks for a command. A schedule assumes you will be there. Geofencing watches you arrive. For South African properties with long driveways and gated entrances, that wash of light across the gravel changes the mood of an entire evening. Homeowners who already invested in flood lights with remote get this upgrade with no extra hardware.
Future-Proofing with Zigbee, Z-Wave, or Wi-Fi
South African homes are moving beyond simple timers. The real shift is in the protocol that carries the signal. Zigbee and Z-Wave create a mesh network where every device reinforces the next. Wi-Fi offers direct connection to your router. Each option changes how your flood lights with remote respond to the wider smart home ecosystem.
Consider what happens when you add sensors, cameras, or motorised gates. A Zigbee flood light becomes a node. Z-Wave operates on a frequency that avoids Wi-Fi congestion. Your existing flood lights with remote can join this network without replacing the fixture itself.
- Zigbee for low power consumption and mesh reliability
- Z-Wave for dedicated home automation frequency
- Wi-Fi for simplicity and existing router infrastructure
Future-proofing means choosing a protocol that accepts new devices as your system grows.